Hello Folks,
Spring is almost a memory and summer is quickly approaching!
I love the summer, it seems to incorporate so many wonderful things. Warm air, the ability to wear shorts almost all the time, and of course great summer cocktails, that simply demand to be made on one of those forthcoming hot afternoons. With that lovely thought in mind, I wanted to share a few recipes that I really enjoy and most importantly are simple to make.
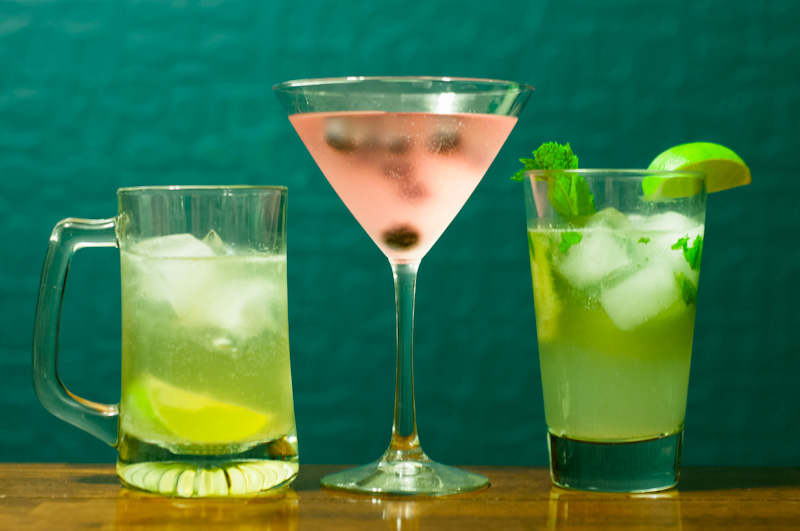
Moscow Mule:
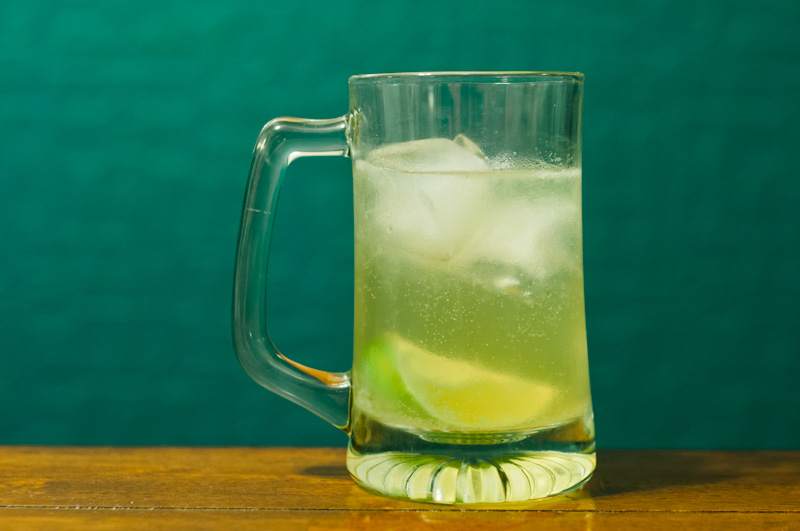
This drink is a new discovery of mine from this past year. I had it for the first time when we were visiting Mary’s cousins down in Orange County. A local bar was serving pitchers of it and marketing it as a refreshing drink that didn’t hit you too hard. I fell in love with it. If you try the recipe and like it, you should go ahead and get yourself a set of copper mugs. For traditions sake it adds an additional charm to this wonderfully refreshing drink. But if you don’t have a set, a standard sturdy glass will do!
Prep Time: 2 Minutes
Yields: Drink for 1 Person
Ingredients:
6 Ounces of Ginger Beer
3 Ounces of Vodka (2 Shots)
1 Lime
4 Ice Cubes
Directions:
Grab a sturdy glass. Go ahead and fill it to the top with ice cubes. Pour in your vodka over the ice. Then take your fresh lime and cut it in quarters. Take the first 3 wedges and squeeze a ½ ounce of juice into the glass. Be sure no seeds fall in! Hang on to the 4th wedge you will use it later for a garnish in the glass. Next step you want to go ahead and grab your Ginger Beer. Fill the glass up until the ice is fully submerged, roughly 6 ounces of liquid. To finish it off go ahead and give the drink a quick stir, drop the lime wedge on top and enjoy!
Blueberry Vodka Martini:
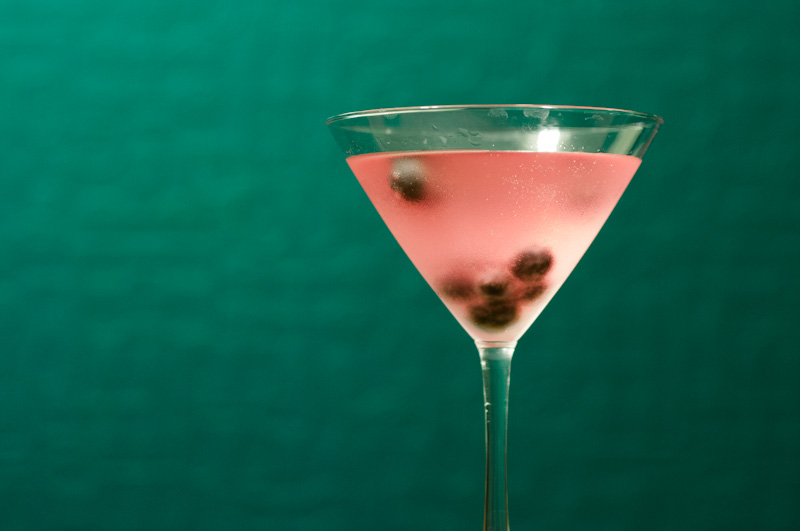
I started making this drink for Mary about 2 years ago. Why, you might ask? Well, she enjoys sweet drinks, we both love using fresh ingredients, and about this time 2 years ago we went blueberry picking and we had so many extra blueberries, so I had to figure out what to do with them. When researching options, I found that you can make syrups from fresh fruit. It’s really simple and it adds a little extra sweetness to a standard vodka martini. Fellas the lady in your house will love it!
Prep Time: 5 Minutes
Yields: Drink for 1 Person
Ingredients:
1 ½ Ounces of Vodka (1 Shot)
1 Tablespoon – White Sugar
¼ Cup of Water
15 Fresh Blueberries
½ Cup of Lemonade
4 Ice Cubes
Directions:
First thing you have to do here is prep the blueberry syrup. This is really easy to do, go ahead and grab a small soup pot. Fill it with about a ½ cup of water and a tablespoon of white sugar. Next thing you want to do is grab about 10 blueberries and literally crush them in your hands over the pot until the juices drop into the sugar and water. Then go ahead and drop the skins in as well. This will give the syrup the color you want in the final drink. Bring the pot to a boil stirring constantly. You will know you are done when all the sugar has broken down. Next you want to grab a martini shaker, fill it with 4 cubes of ice, the vodka, and the lemonade. Give it a quick shake, serve in a martini glass and throw in the additional five blueberries as a garnish. Enjoy the splash of vodka when you start to sip and the sweet blueberry taste as it goes down. Remember if blueberries aren’t your thing you can use other fresh fruits to make syrups as well. Just follow the same instructions.
Mojito:
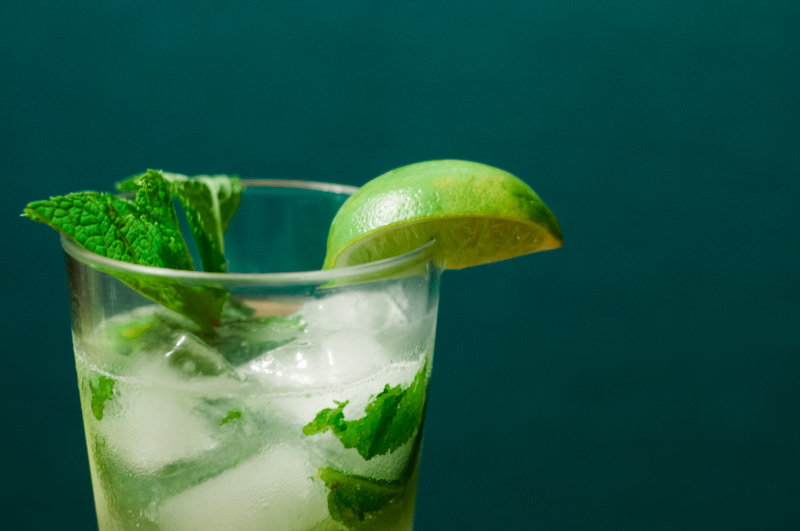
This is one of my favorite summertime drinks. It’s always a hit, so refreshing, so cooling, and of course it tastes wonderful with its lovely sweetness. You can serve it with many flavors, but I am a big fan of the classic way. Lots of people think that it takes a great deal of effort to make a mojito but it really doesn’t. Often called the National Drink of Cuba it really hits the spot on a hot day or humid evening!
Prep Time: 2 Minutes
Yields: Drink for 1 Person
Ingredients:
10 Fresh Mint Leaves
1 Lime
2 Tablespoons of White Sugar
4 Ice Cubes
1 ½ Ounce of White Rum (1 Shot)
½ Cup Club Soda
Directions:
First thing you want to do is cut your fresh lime into quarters. Grab a sturdy glass and drop 1 of the wedges in. Next step is to throw in your fresh mint leaves. Then grab a muddler, if you don’t have one a wooden spoon with a blunt end will do just fine, and muddle the mint and the lime together. This releases the juice and the mint and you will immediately be able to tell. Next thing you want to do is throw in 2 more of your lime wedges and drop in the white sugar. Go ahead and muddle the new entries of the glass for a few moments until more of the juices release. Then you want to throw in your rum and fill the rest of the glass with your club soda. Do not use tonic water! After you have everything together give it a quick stir and throw in your last lime wedge as a garnish. Enjoy!
These are all wonderful drinks, but remember, due to their sweetness you may not think they are having much of an effect on you, but like all drinks they are, so make sure you drink responsibly.
Good Spirits Folks!
[addtoany]


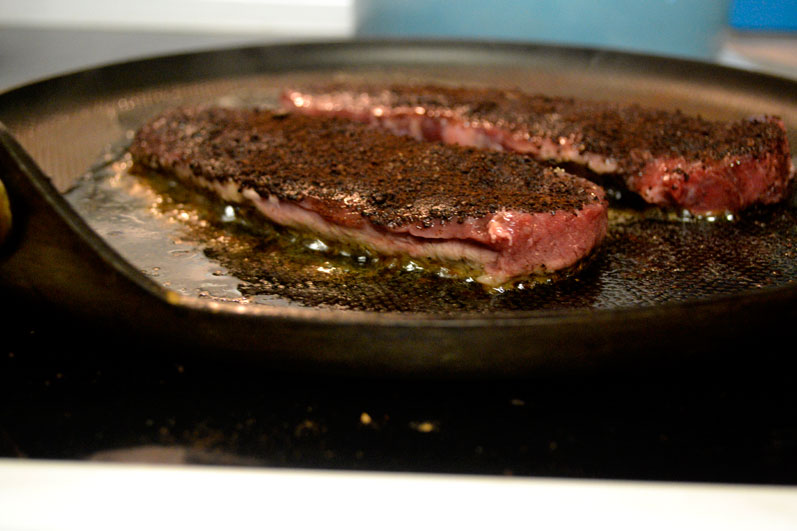
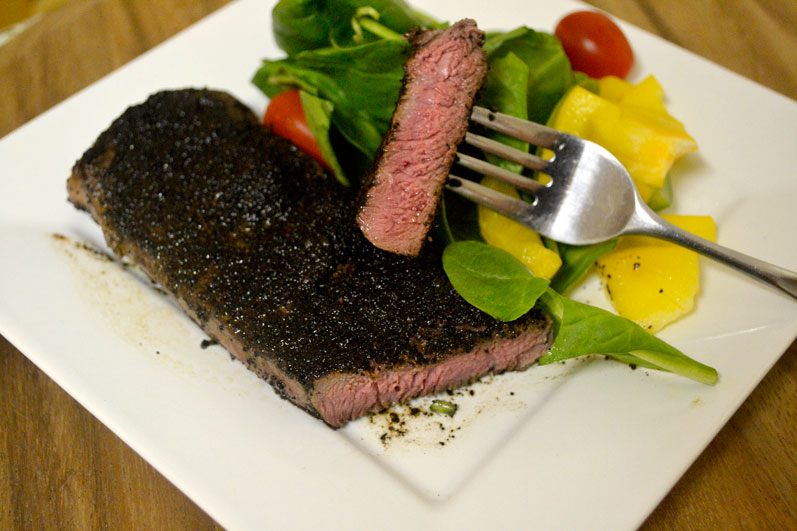 Having said all that, this was still a completely enjoyable meal. Two out of two (mine and Meg’s) clean plates agree that this steak was certainly delicious enough to eat in its entirety. The coffee grounds, though a bit gritty (again, because I over-coffee-ed), gave a sort of faux-smokey flavor, and I can imagine a smaller helping of coffee grinds making a truly delicious addition to any steak.


