
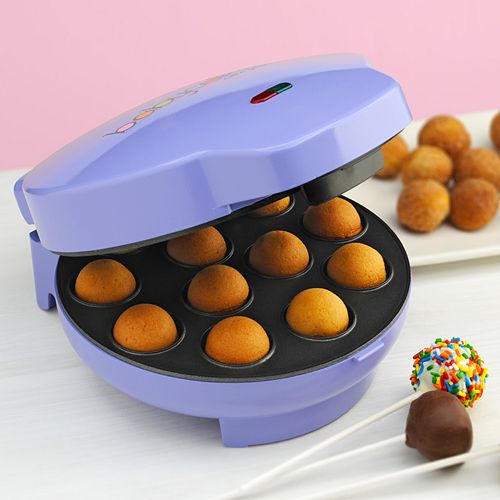
When I first saw the Babycakes cake pop maker, I was SOOOO excited. I didn’t even think twice about buying it. A super easy way to make cake balls without having to use frosting and basically skipping all the hard steps? Yes please! I was just waiting for the perfect opportunity to make a million cake balls.
Along came Halloween, and the daunting task of baking for 130 coworkers. Sounded like the perfect opportunity to break out the cake pop maker. Jennie was manning the machine while I mixed batch two of the pumpkin cake mix. The first batch came out perfectly. We filled each slot with 1 tablespoon of batter, and baked for 4 minutes. We got a dozen beautiful little cake balls baked to perfection.
Batch two took a turn for the way worse, and was burned to a crisp in only 1 minute, including enough smoke to set off a detector (thankfully it didn’t). Jennie had decided against re-oiling the pan (for better or worse), and sadly scorched our second dozen. We blamed the instant burning on that, and dived back in.
We re-oiled, let the pan cool a bit, and then attempted batch three. It worked! 4 minutes later, we had cake balls again. Then disaster struck. The cake pop maker wouldn’t turn on anymore! We tried every outlet in the kitchen, we tried letting it cool and then re-plugging it in. Nothing worked. Jennie and I went into panic mode for a second, and then remembered we could still make traditional cake balls. We threw the remaining batter into three pans and stuck them in the oven. Ellen happened to have a mini muffin tin that was similar in shape to the cake pop maker. They came out a bit flat on top, but we just turned those into Frankensteins. Problem solved!
The rest of the batter was baked and mixed with frosting. It all worked out and it all tasted delicious. Sadly, I will be returning the cake pop maker. I like my traditional cake ball method when all is said and done. It may be extra work, but it is well worth it for a tried and true dessert. The cake balls just weren’t quite as tasty without that little bit of frosting, and were harder to get to stick to the lollipop sticks without that extra moisture.
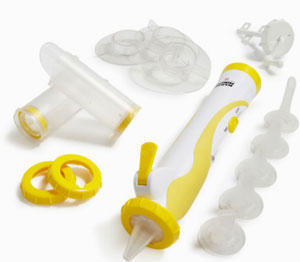
My other new toy is the decorating wizard frosting pen. Jennie was terrified of it, but I loved it. The cream cheese frosting we had made was a bit goopy (but delicious) which I think complicated things slightly for us.
The frosting pen comes with 5 tips and a filler for putting jelly in the center of cupcakes. I’m excited to delve into that, but for this adventure, we really just needed to make some flowers and some leaves. Getting the frosting into the device was the hardest part. I ended up having Jennie hold the frosting cartridge and slowly spooning about three-fourths inside, and about one-fourth on Jennie. There is no way to lock the decorating tip in place, which posed a problem when attaching the tip to the container with the frosting. After a little trial and error, I managed to get it on, but not very securely. As we were frosting, there was a bit of frosting coming thought the cracks. Not enough to be a problem, just a nuisance.
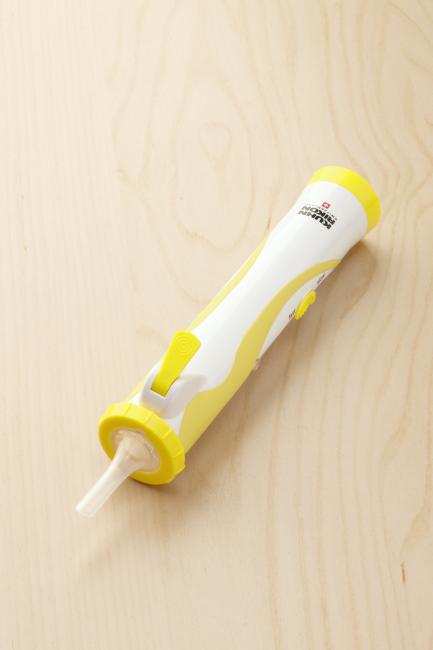
In order to frost, you push a little lever down. It has a slow speed and a fast speed, but the slow speed was so fast, we pretty much stuck to that. Pressing down slightly reverses the frosting back into the cartridge, which was a helpful tip. Everything was coming out fine, perhaps a little fast, but we were working it out. The most challenging part was stopping the flow of frosting when you wanted it to without ruining the design just created. I realized at the very end you had to ease up on the lever about 3 seconds before you wanted to finish, allowing a bit more frosting to come out, but not leaving you with frosting hanging or dripping onto your cake. The process was very messy, especially considering we were using three different colors of frosting, and switching back and forth between them. It takes a bit of practice, but I enjoyed the frosting pen, and was very pleased with how the cake came out. Practice makes better!
[addtoany] Yum