
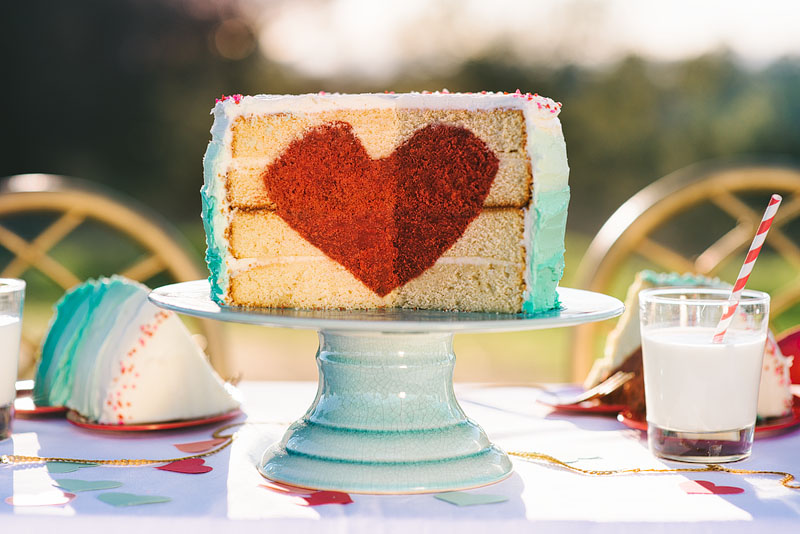
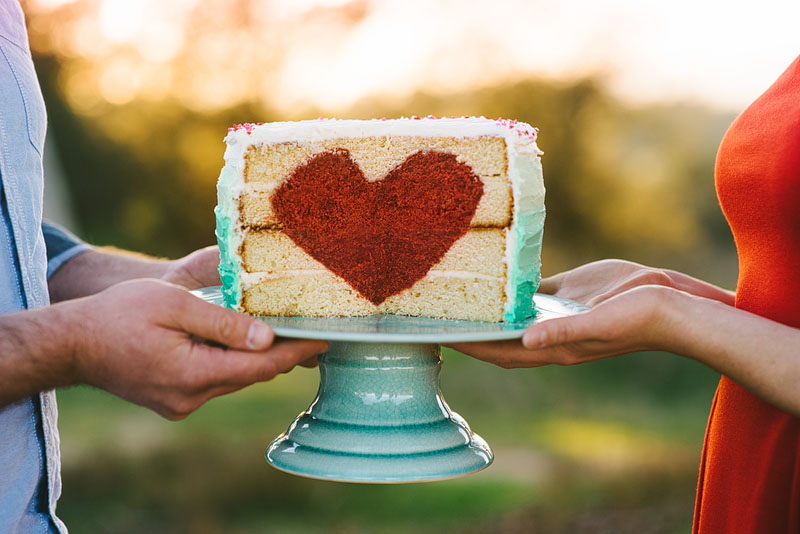
It’s February, which means we made this fabulous heart cake in what has become a Valentine’s Day tradition here at GMS. Last year, Rebecca provided a detailed tutorial explaining how it’s done, but we thought you might like a condensed version of her instructions, in case you want to try it yourself!
Update 2/11/2014: Be sure to check out this year’s heart cake after you read the tutorial!
phase 1: baking the cakes
You will need 4 round layers of dense white cake, and one red velvet (or any other colored) sheet cake. The white cake is your outer layer and the red cake is your heart filling. Feel free to use your own recipes, but make sure your outer layer white cake is very dense! It will need to hold its shape even when you carve out most of the middle.
White Cake Recipe
note: the recipe below has been doubled to yield four 9-inch cakes
5 ½ cups all-purpose flour
2 tsp baking powder
2 cup (4 sticks) unsalted butter, softened
4 cups sugar
8 large eggs, at room temperature
2 cups buttermilk
2 tsp vanilla extract
Directions:
1. Preheat oven to 350°
2. Combine flour and baking powder in a separate bowl.
3. In a new bowl, cream the butter and sugar, adding the sugar a half cup at a time.
4. Add eggs one at a time
5. Add the vanilla and milk.
6. Add flour slowly and mix until just incorporated.
7. Grease and flour four 9-inch round cake pans
8. Bake at 350 for 20 – 30 minutes, until a toothpick comes out clean.
Red Cake Recipe
For your heart filling, we have adapted a recipe from Magnolia Bakery, but this one is really up to you. If you’re going for a deep red color, this is a great recipe and it makes a nice large cake. However, if you’d like to make your heart pink or yellow or aquamarine, then you might consider a different recipe. One that doesn’t involve cocoa powder.
If you do decide to make another type of cake, consider doubling the recipe so it will bake in a 13×9 inch pan. You will need a LOT of cake filling.
3 1/3 cups cake flour (not self-rising)
2 sticks unsalted butter, softened
2 ¼ cups sugar
2 eggs, at room temperature
2 egg yolks, at room temperature
6 tablespoons red food coloring (use liquid food coloring, do not use gel)
3 tablespoons unsweetened cocoa
1 ½ teaspoons vanilla extract
1 ½ teaspoons salt
1 ½ cups buttermilk
1 ½ teaspoons apple cider vinegar
1 ½ teaspoons baking soda
Directions:
1. Preheat oven to 350°
2. Measure and sift your flour in a separate bowl
3. In a new bowl, cream the butter and sugar with a mixer
4. Add eggs one at a time and beat until combined
5. In a new bowl, mix the cocoa powder, vanilla, and red food coloring
6. Add the cocoa mixture to your eggs, butter and sugar. Adjust the color at this point, adding red food coloring if necessary.
7. Mix buttermilk and salt together, then add to the red mixture.
8. Add your flour slowly and beat until combined
9. In a separate bowl, pre-mix your apple cider vinegar and baking soda, then add it your batter and mix everything together.
10. Pour into a greased and wax paper-lined 13×9 inch pan, bake for 30 – 45 minutes until a toothpick comes out clean.
phase 2: prep the cakes for assembly
1. Level your white cakes.
2. In case you ignored me the first time, seriously, level your cakes.
3. Stack your cakes two by two, with frosting between the rounds.
4. Freeze the cakes for one hour
5. While the white cakes are in the freezer, use two forks to break up the red cake, discarding any brown parts, so you’re left with a big pile of red, fluffy cake insides.
6. The red cake should be moist. If you find that it’s too dry and crumbly, mix with some frosting.
phase 3: assembly
1. Remove your white cakes from the freezer.
2. Cut two identical circles out of wax paper, and center them on the top of your two round cake halves. Use toothpicks, a knife, and a steady hand to trace the circle onto your cake.
3. On the cake stack that will become the bottom half of your heart cake, carve a 3-dimensional V into your cake, sloping inward from the edges of the circle you traced.
4. On the cake stack that will become the top half of your heart cake, carve out the top of your heart. It should slope slightly outward from the edges of your circle, then slope back in and come back up to a point in the center. Imagine a sideways 3, or a rounded M.
note: an ice cream scoop can be useful for carving the rounded edges of the heart!
5. Carefully fill the white cakes with your red cake stuffing, packing it down as you go.
6. Put both halves of the cake back in the freezer for about 30 minutes to firm up. Don’t lose track of which half is the top and which is the bottom!
7. After 30 minutes, flip your top cake and stack it on top of your bottom cake so that the circles line up.
8. Frost your cake. When you cut into it, there will be a heart in the center!
Be sure to check out I Am Baker and her heart cake. She deserves credit as our inspiration for this crazy project!
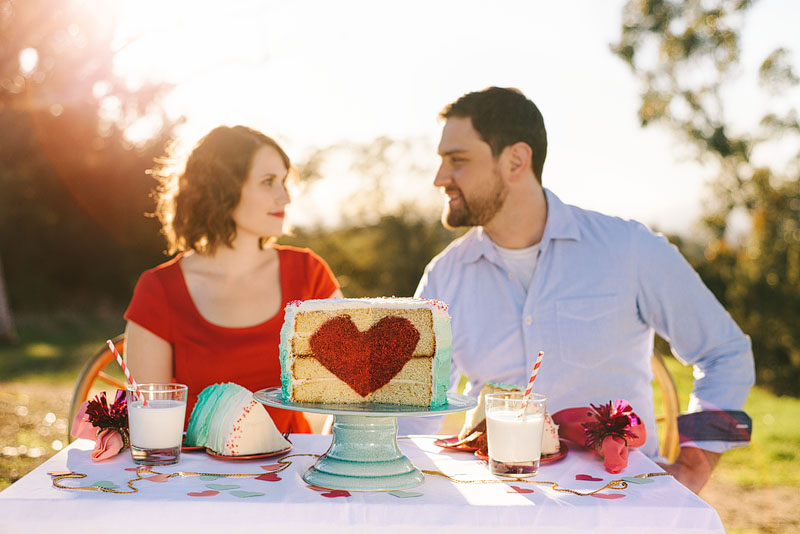
Check back here on Valentine’s Day to see more photos of our heart cake featured in a lovely photo shoot by Mary Costa with handmade crafts by StudioDIY!!
[addtoany] Yum