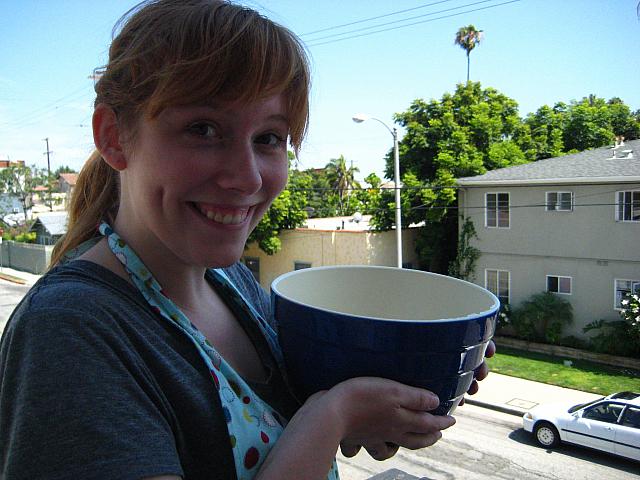
When Melissa and I decided to can, we were ready. We read a million books, we had a canning set from Ms. Sierra, and we had a giant pot from Corelyn and I when we decided to brine a turkey. We bought jars. We bought lids. We bought pectin. We bought the canning rack.

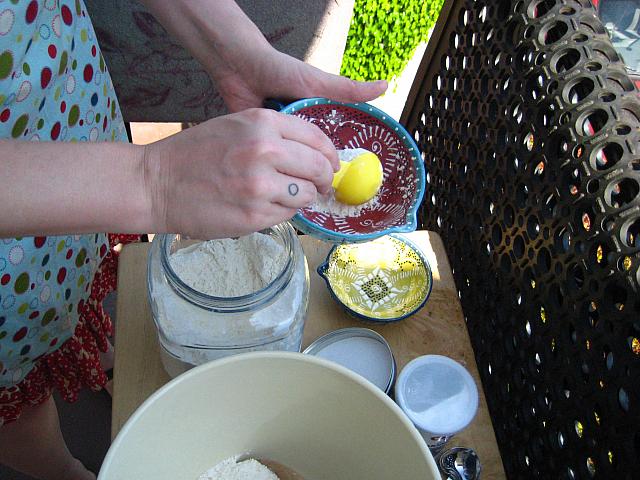
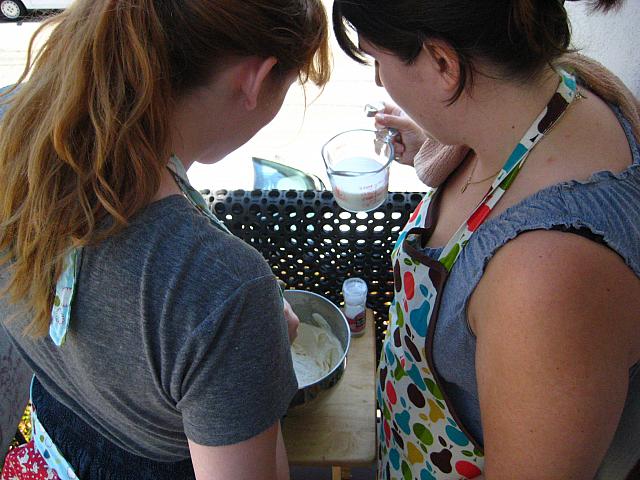
On Sunday, we raced to the farmers’ market to get the fruit and veggies we needed. We re-read the the recipes. Melissa ventured out for more vinegar, some peppercorns. Now, now we were ready. We re-read again. We wrote the recipes down. We did the math, halving them.

In the end, we still hit some bumps. We forgot to stir the bubbles out of the pickles and had to quickly pull them out and do that. Melissa wanted to tighten the bands too tight and I had to steer her clear. We forget the lemon juice for the preserves and remembered to add it in the nick of time, although we couldn’t strain it because we didn’t have a gluten-free mesh colander. But all of our jars sealed, so I think despite our bumps we did alright for our first time!


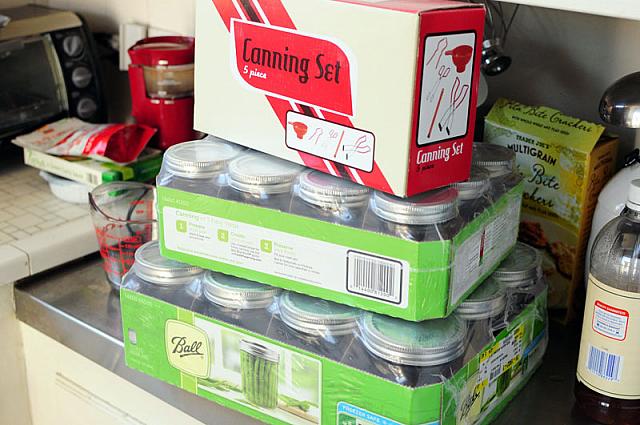
Canning supplies. Two sizes of jars, and the canning set.

Our recipes, halved from the originals.

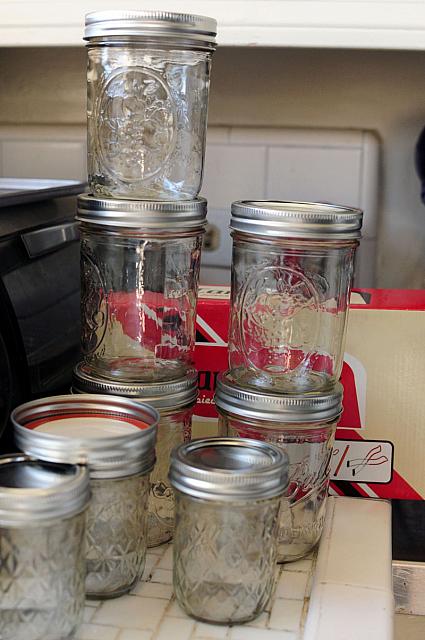
Jars washed and ready.

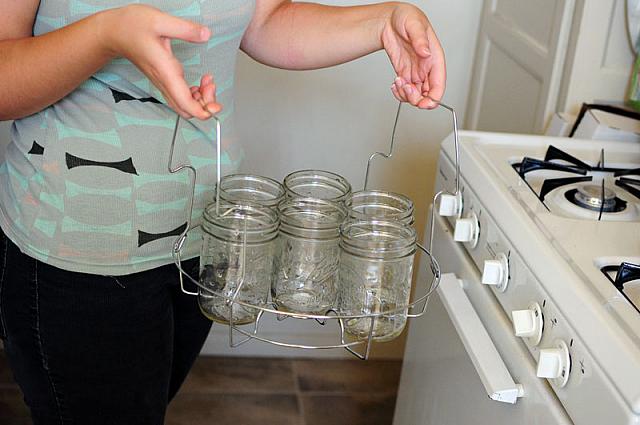
Now we put the jars into the water bath to sterilize. This was especially important for the preserves, which are only in the water bath for five minutes.

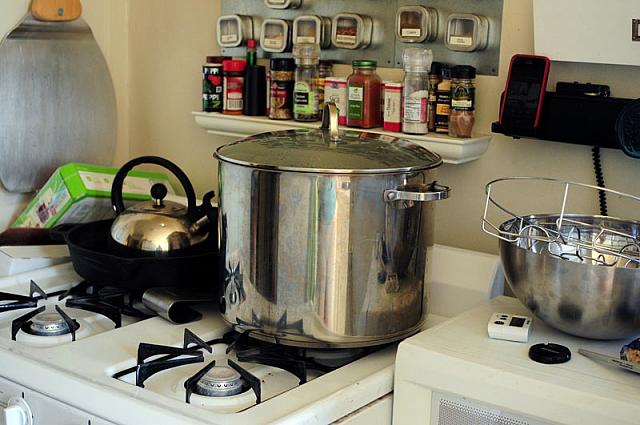
The pot. The biggest pot, ever. Good thing we decided to brine that turkey…

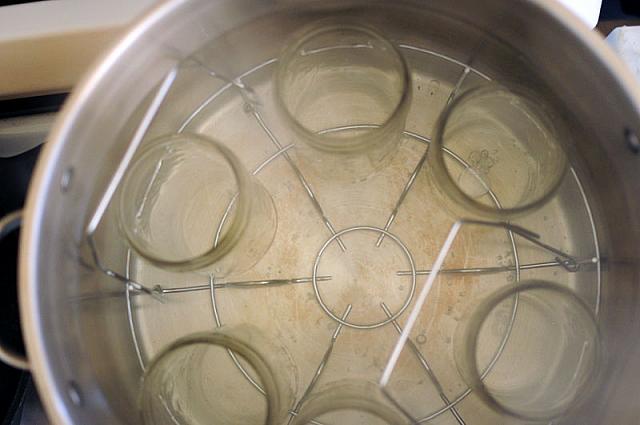
In the water bath to sterilize for ten minutes!

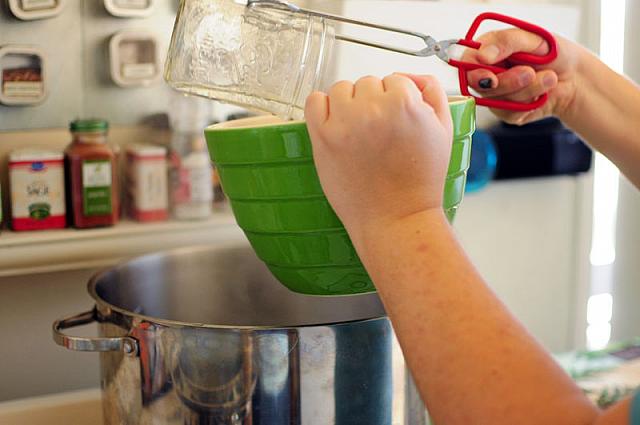
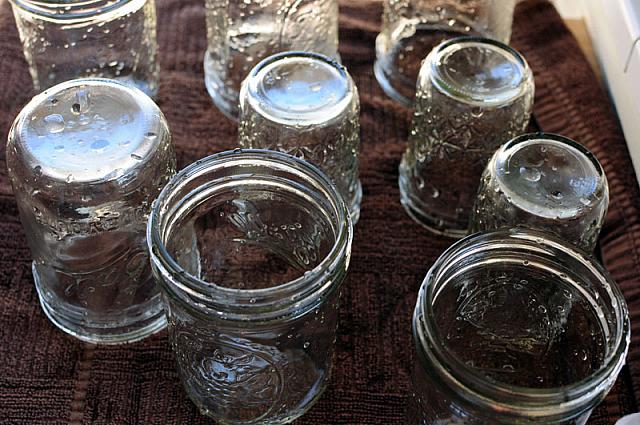
Time to come out. First, you use some of the hot water to cover the lids in a bowl, so the glue on the lids gets soft.

All clean!

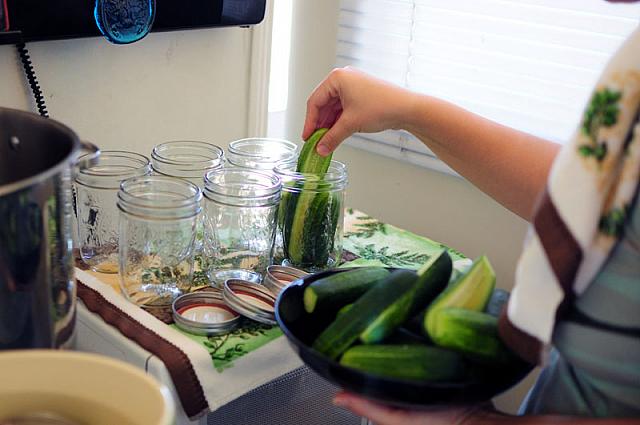
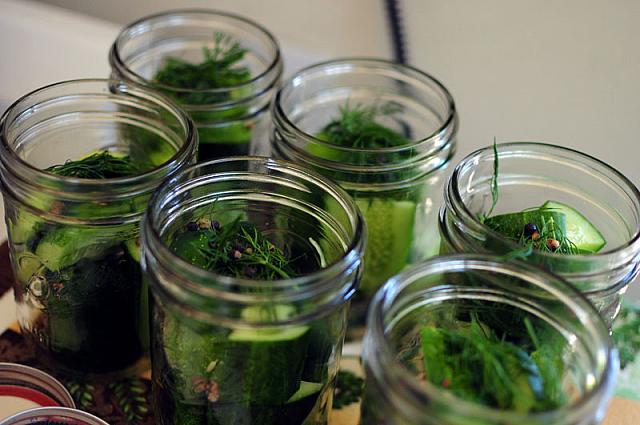
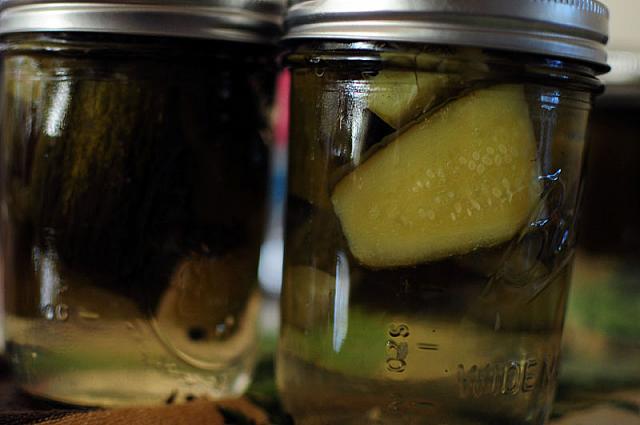
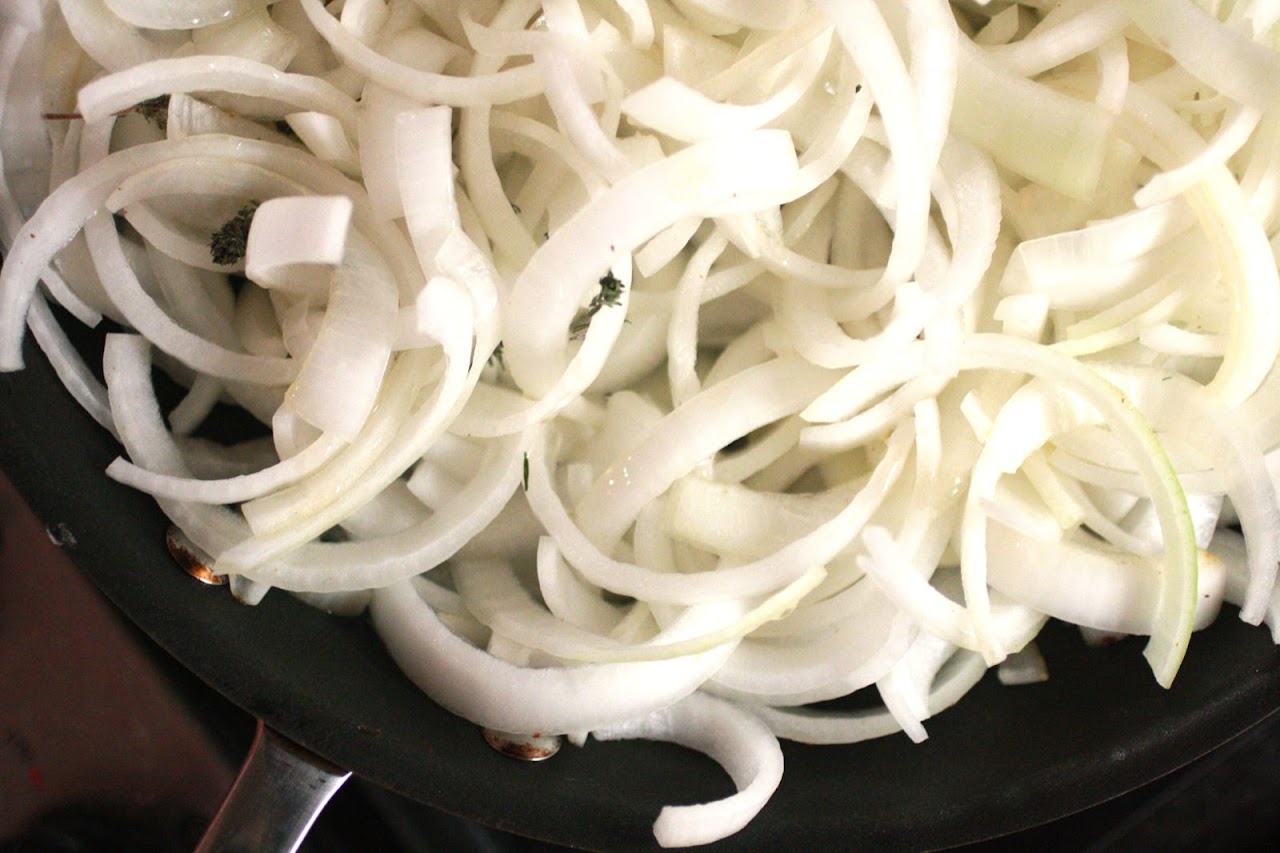
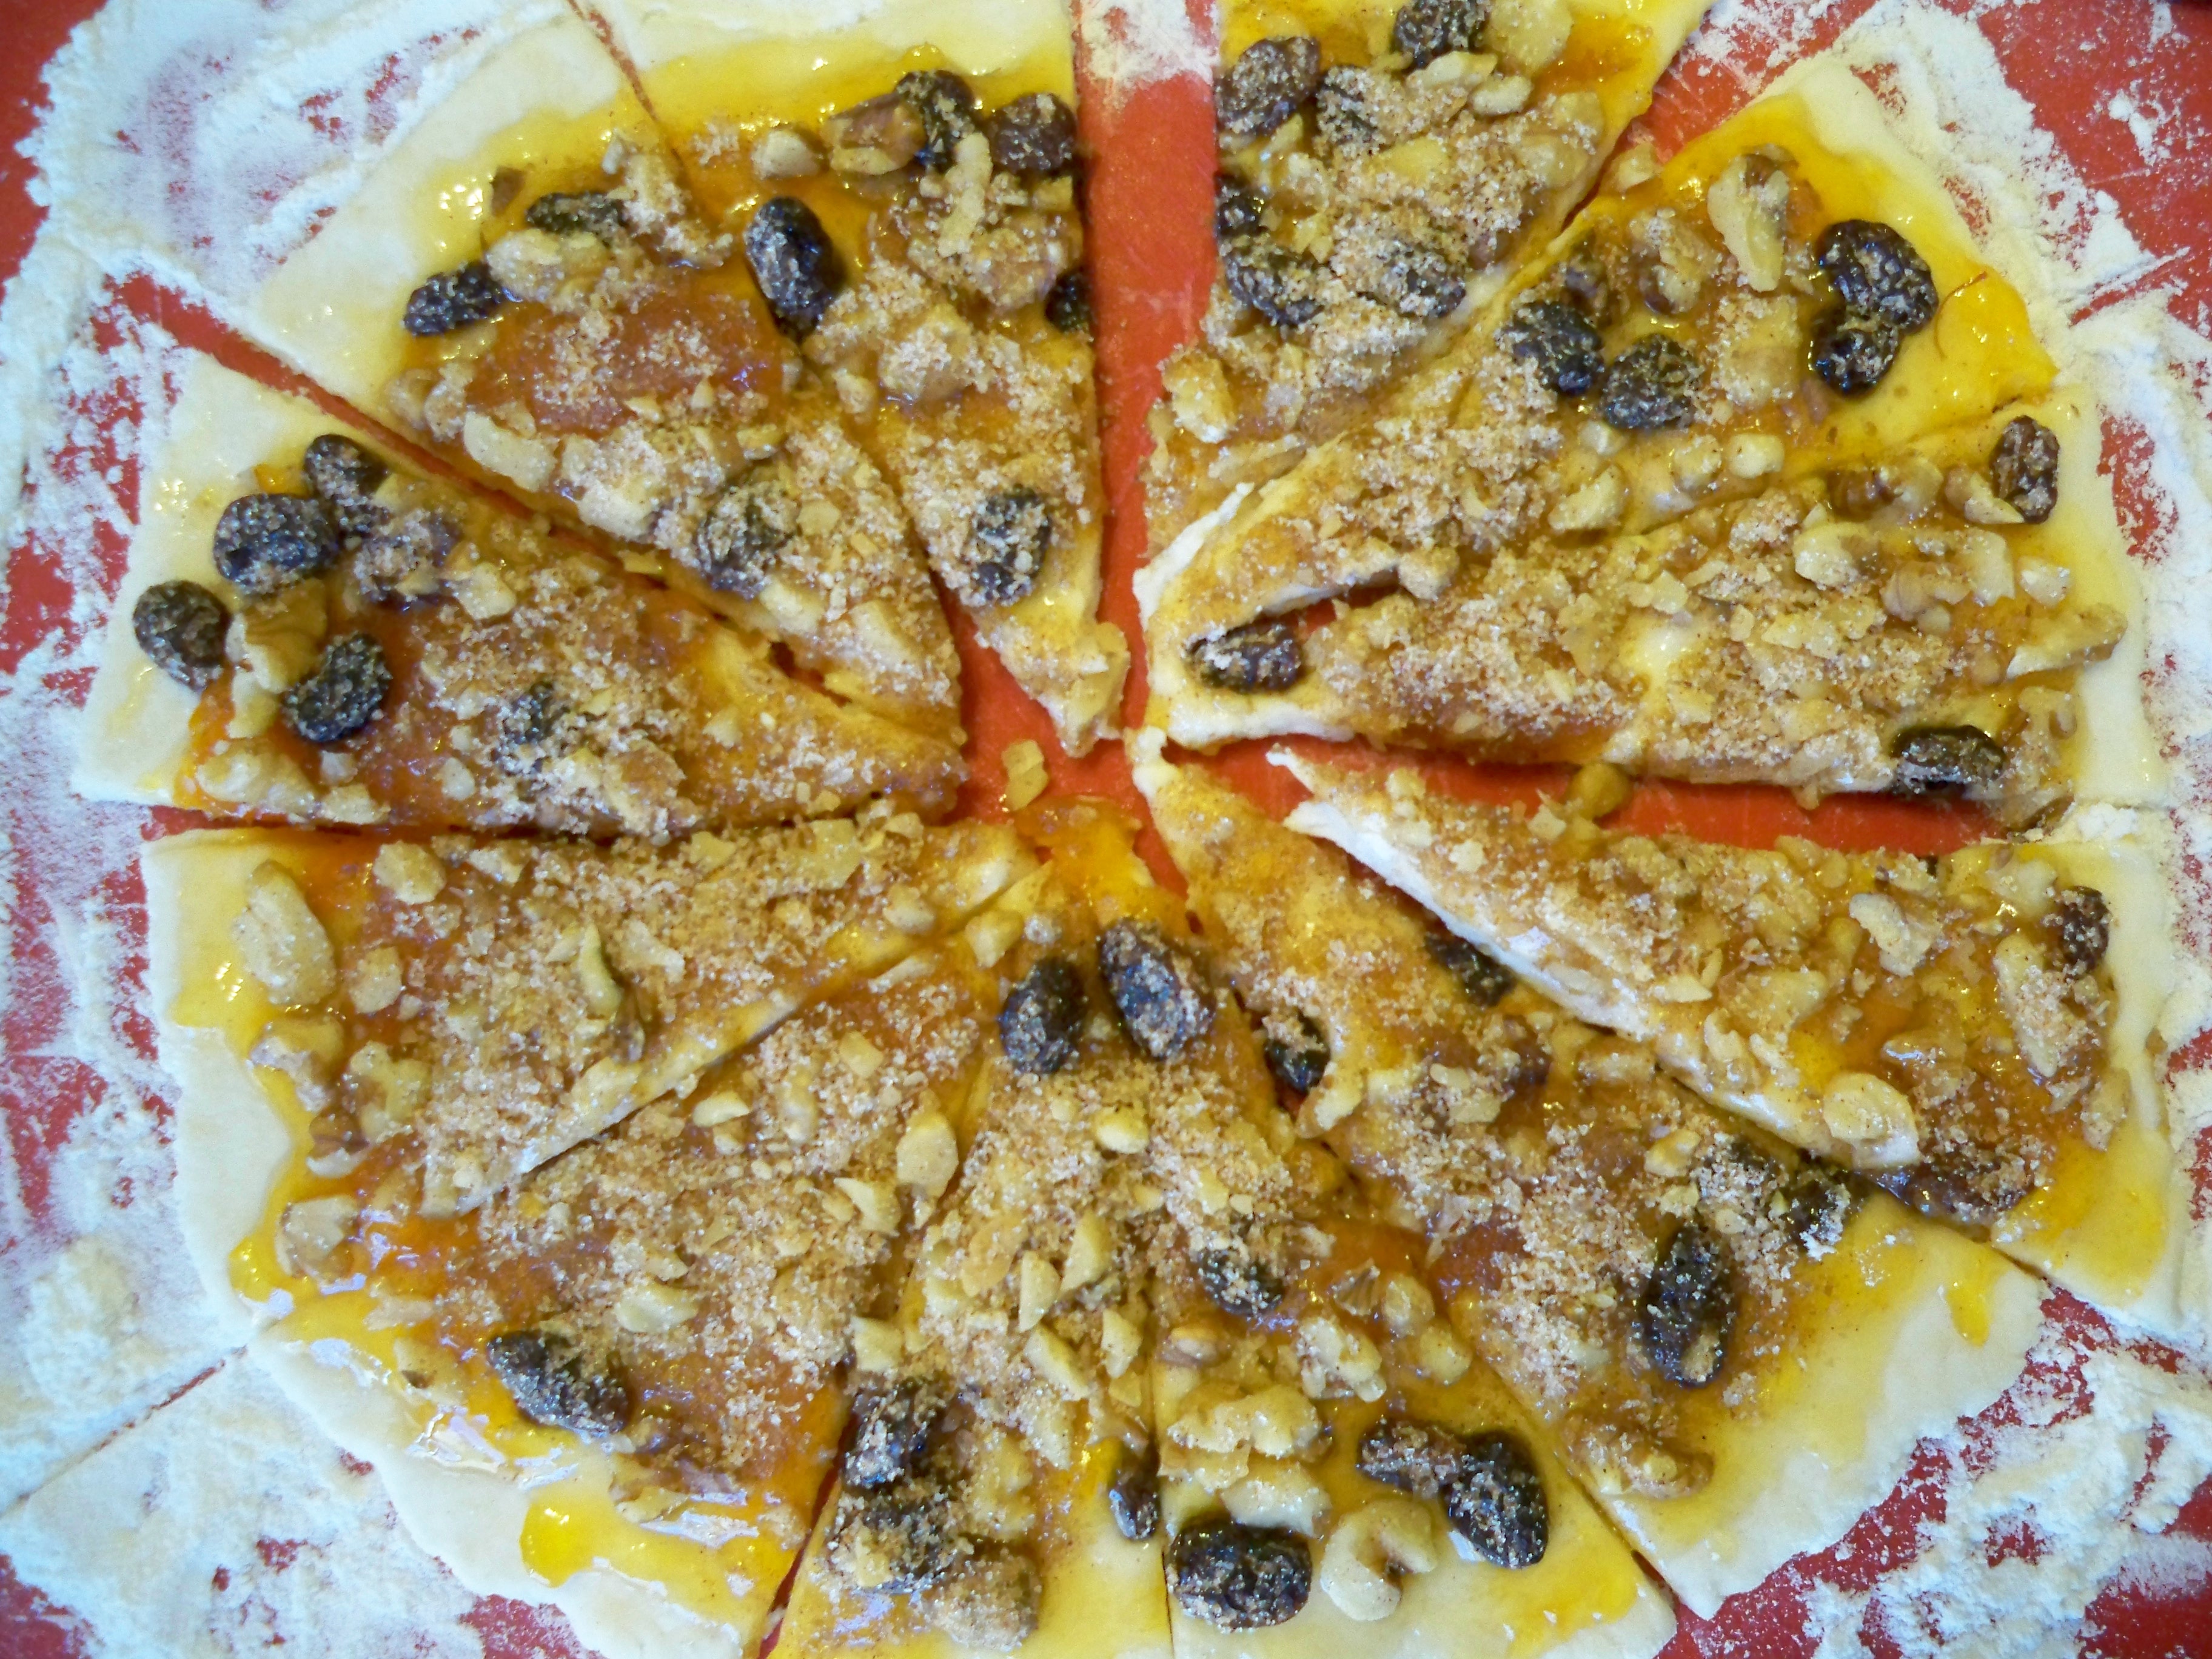
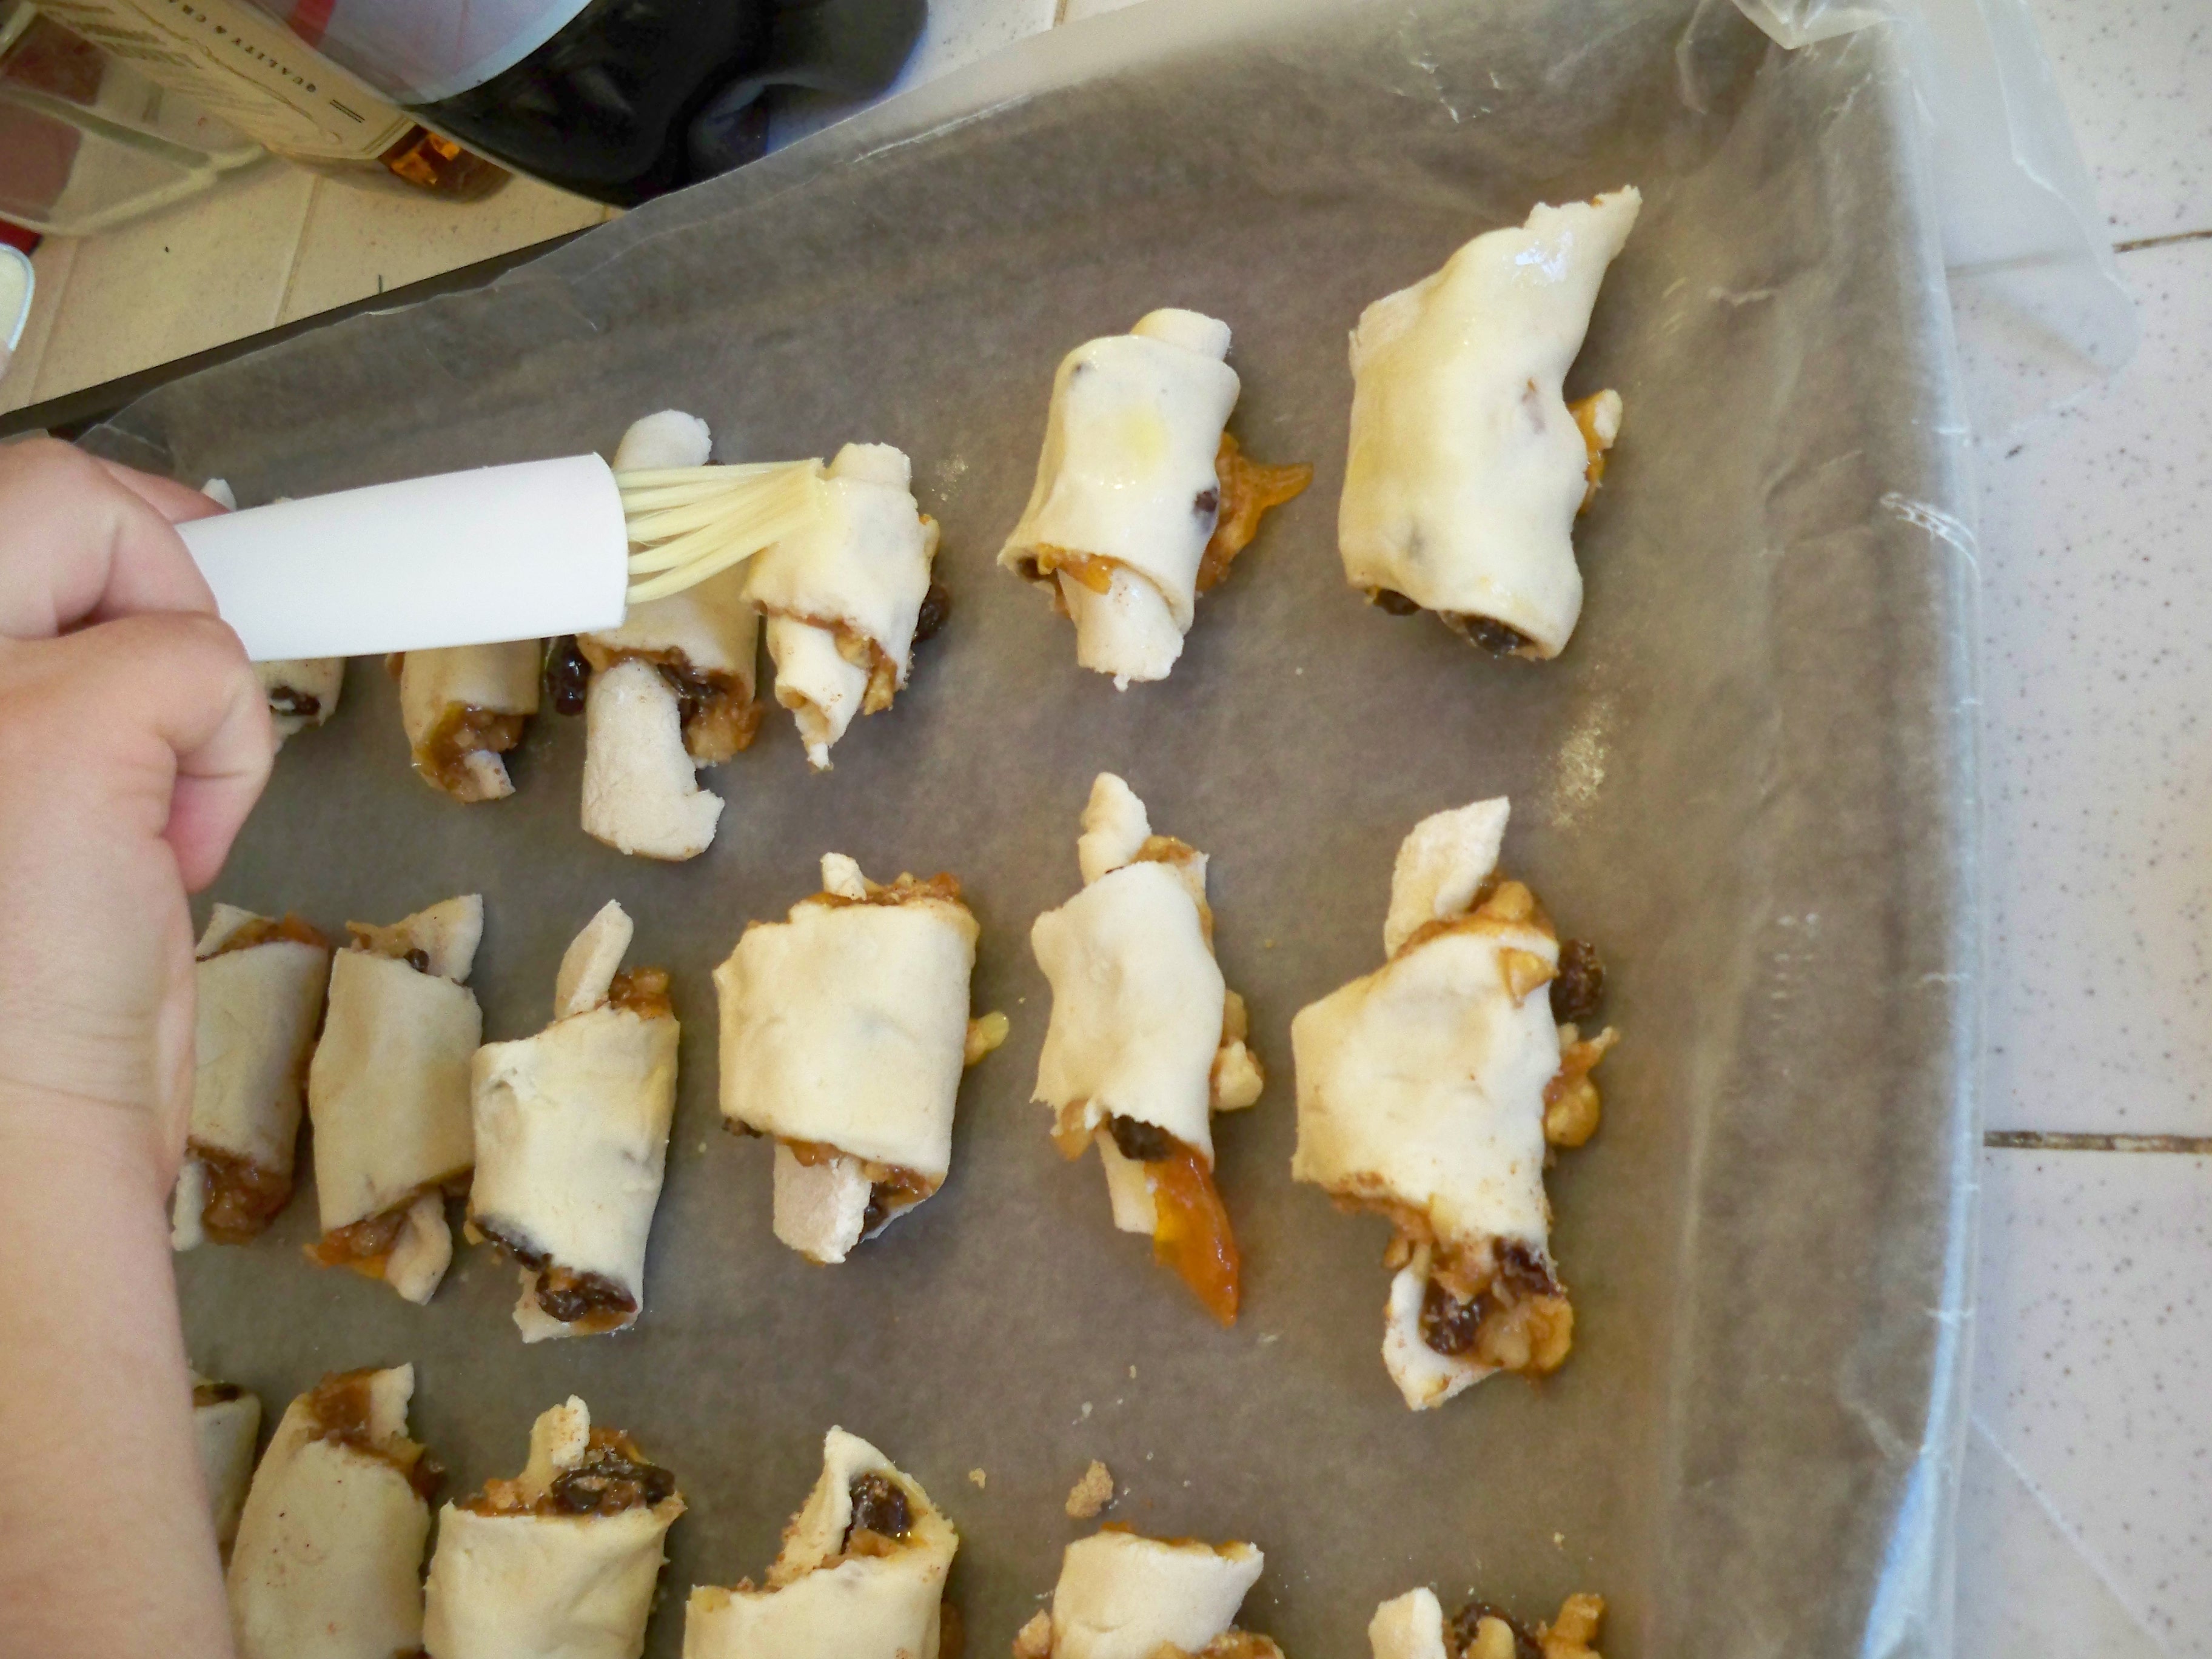
Now you’re going to fill your jars with your business. For pickles, you put in the cucumbers, some peppercorns, some garlic, and some dill.

Then you’re going to fill them with the vinegar solution, and then onto the water bath!

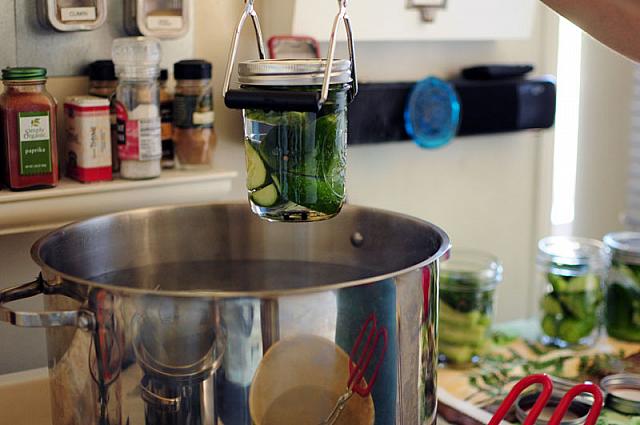
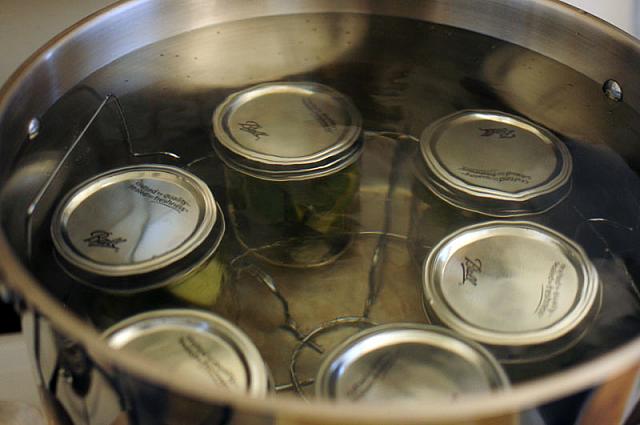
These were boiling for about 10 minutes…

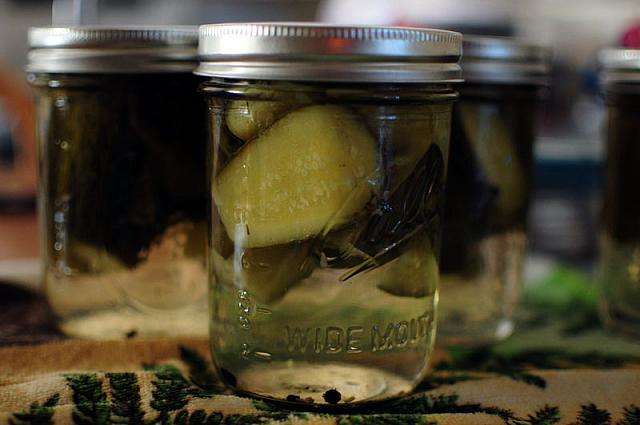
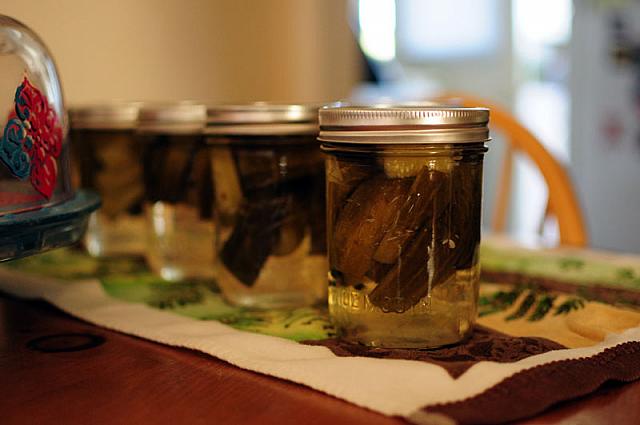
Final pickles, hanging out, cooling.

Now, onto the preserves!

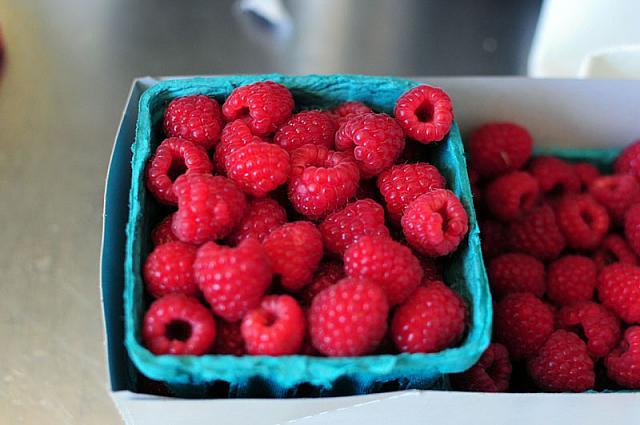
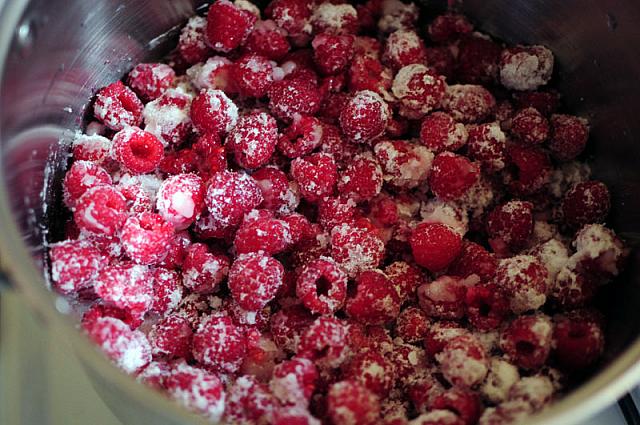
Here are our raspberries. All these raspberries made two jars of jelly! That’s about 25 ounces of raspberries.

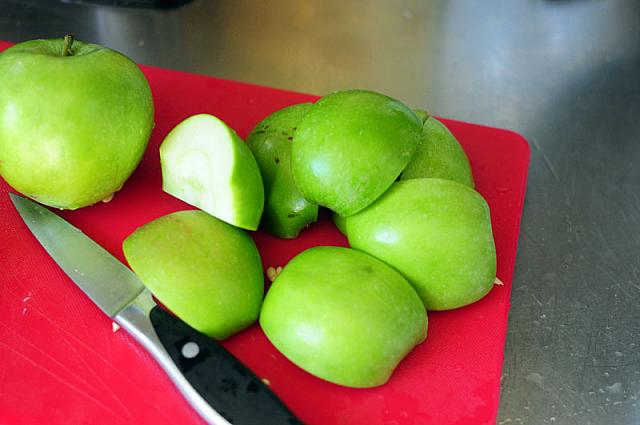
We borrowed this apple’s pectin, so we didn’t have to use the kind that comes in a box.

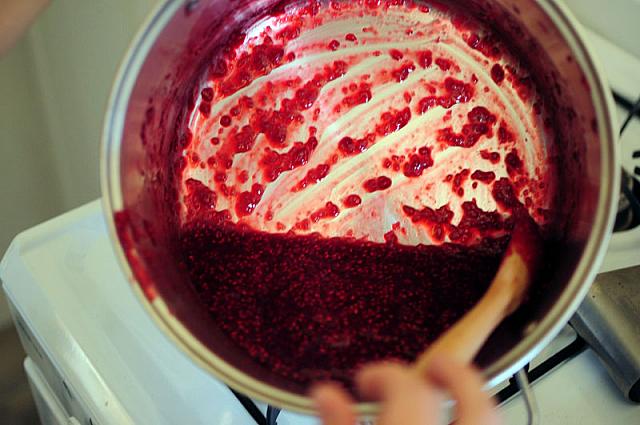
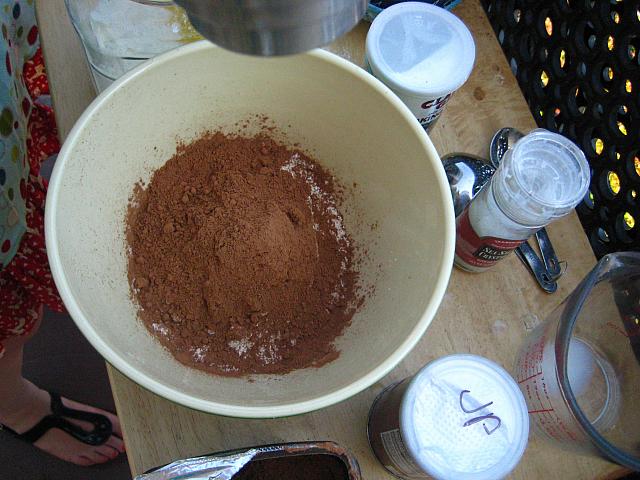
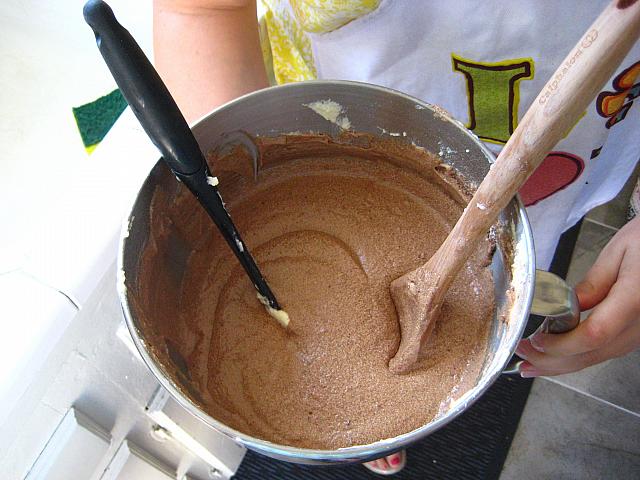
We combined our sugar and our raspberries, then put them over medium heat.

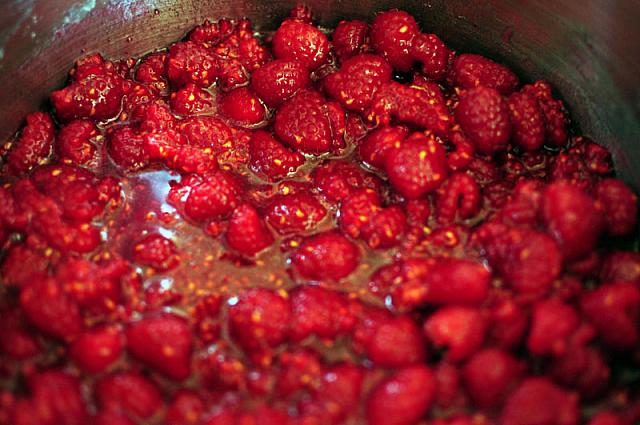
Pretty soon it looked like this…

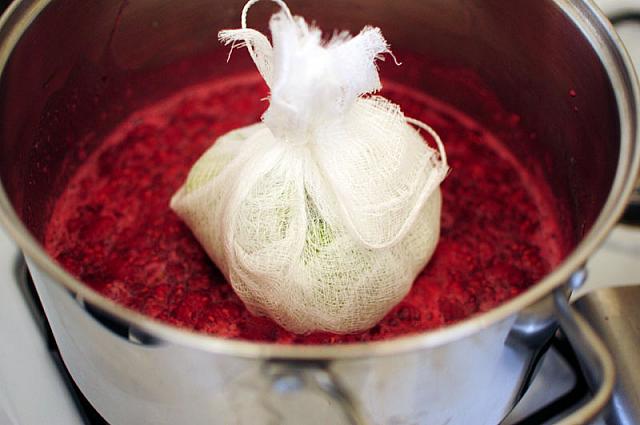
And here is our apple bag, to allow the pectin into the raspberry…

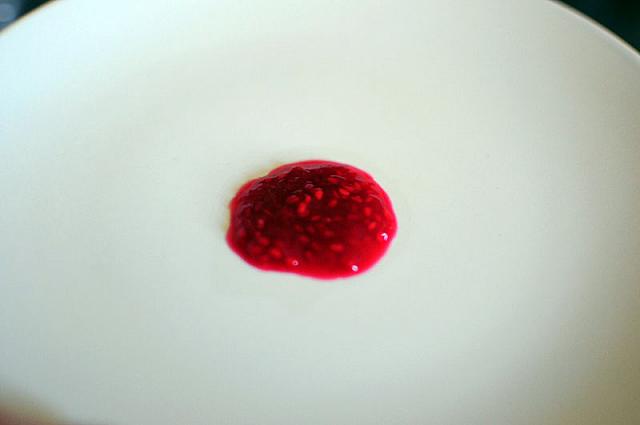
So then you take a plate, stick in in the freezer, and after the apple bag sits in your raspberry mush for about 10 minutes, you put a bit on the freezer-plate, then stick it back in the freezer. After one minute, you see how firm your jelly has become. Ours wasn’t quite ready.

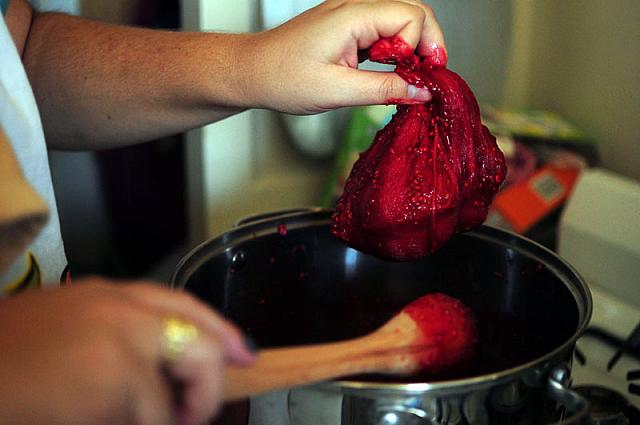
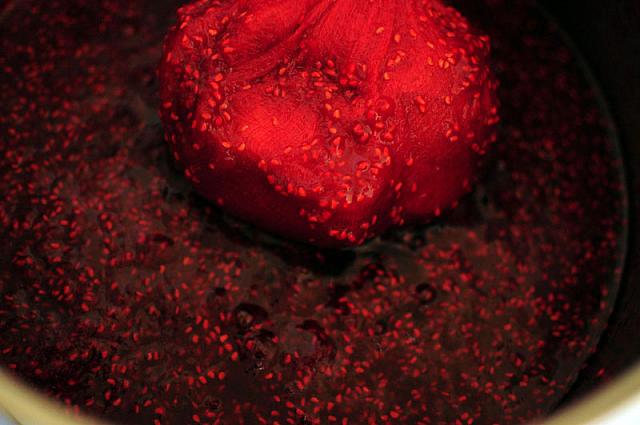
When the jelly was ready, it was time for the apple bag to come out. Our author gave us tons of information on what to do with the apples, but we had to toss them. Not enough time, not enough time!

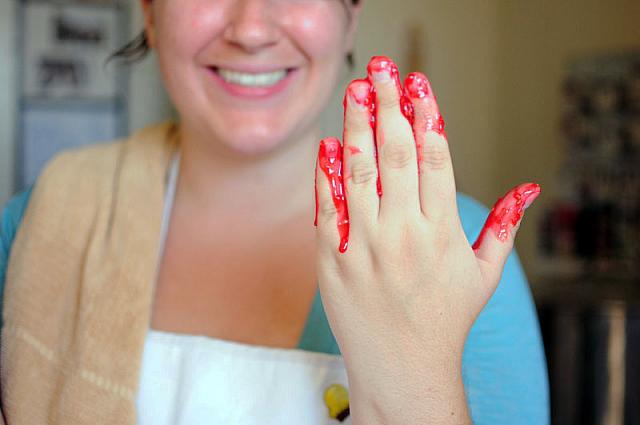
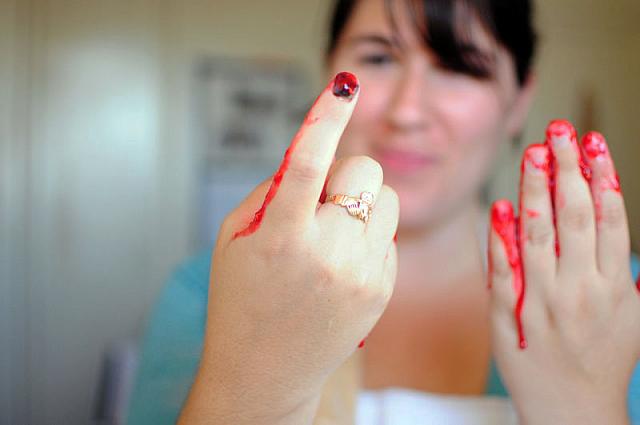
Looked pretty gross with my still-black finger nail. Thought you’d like that!

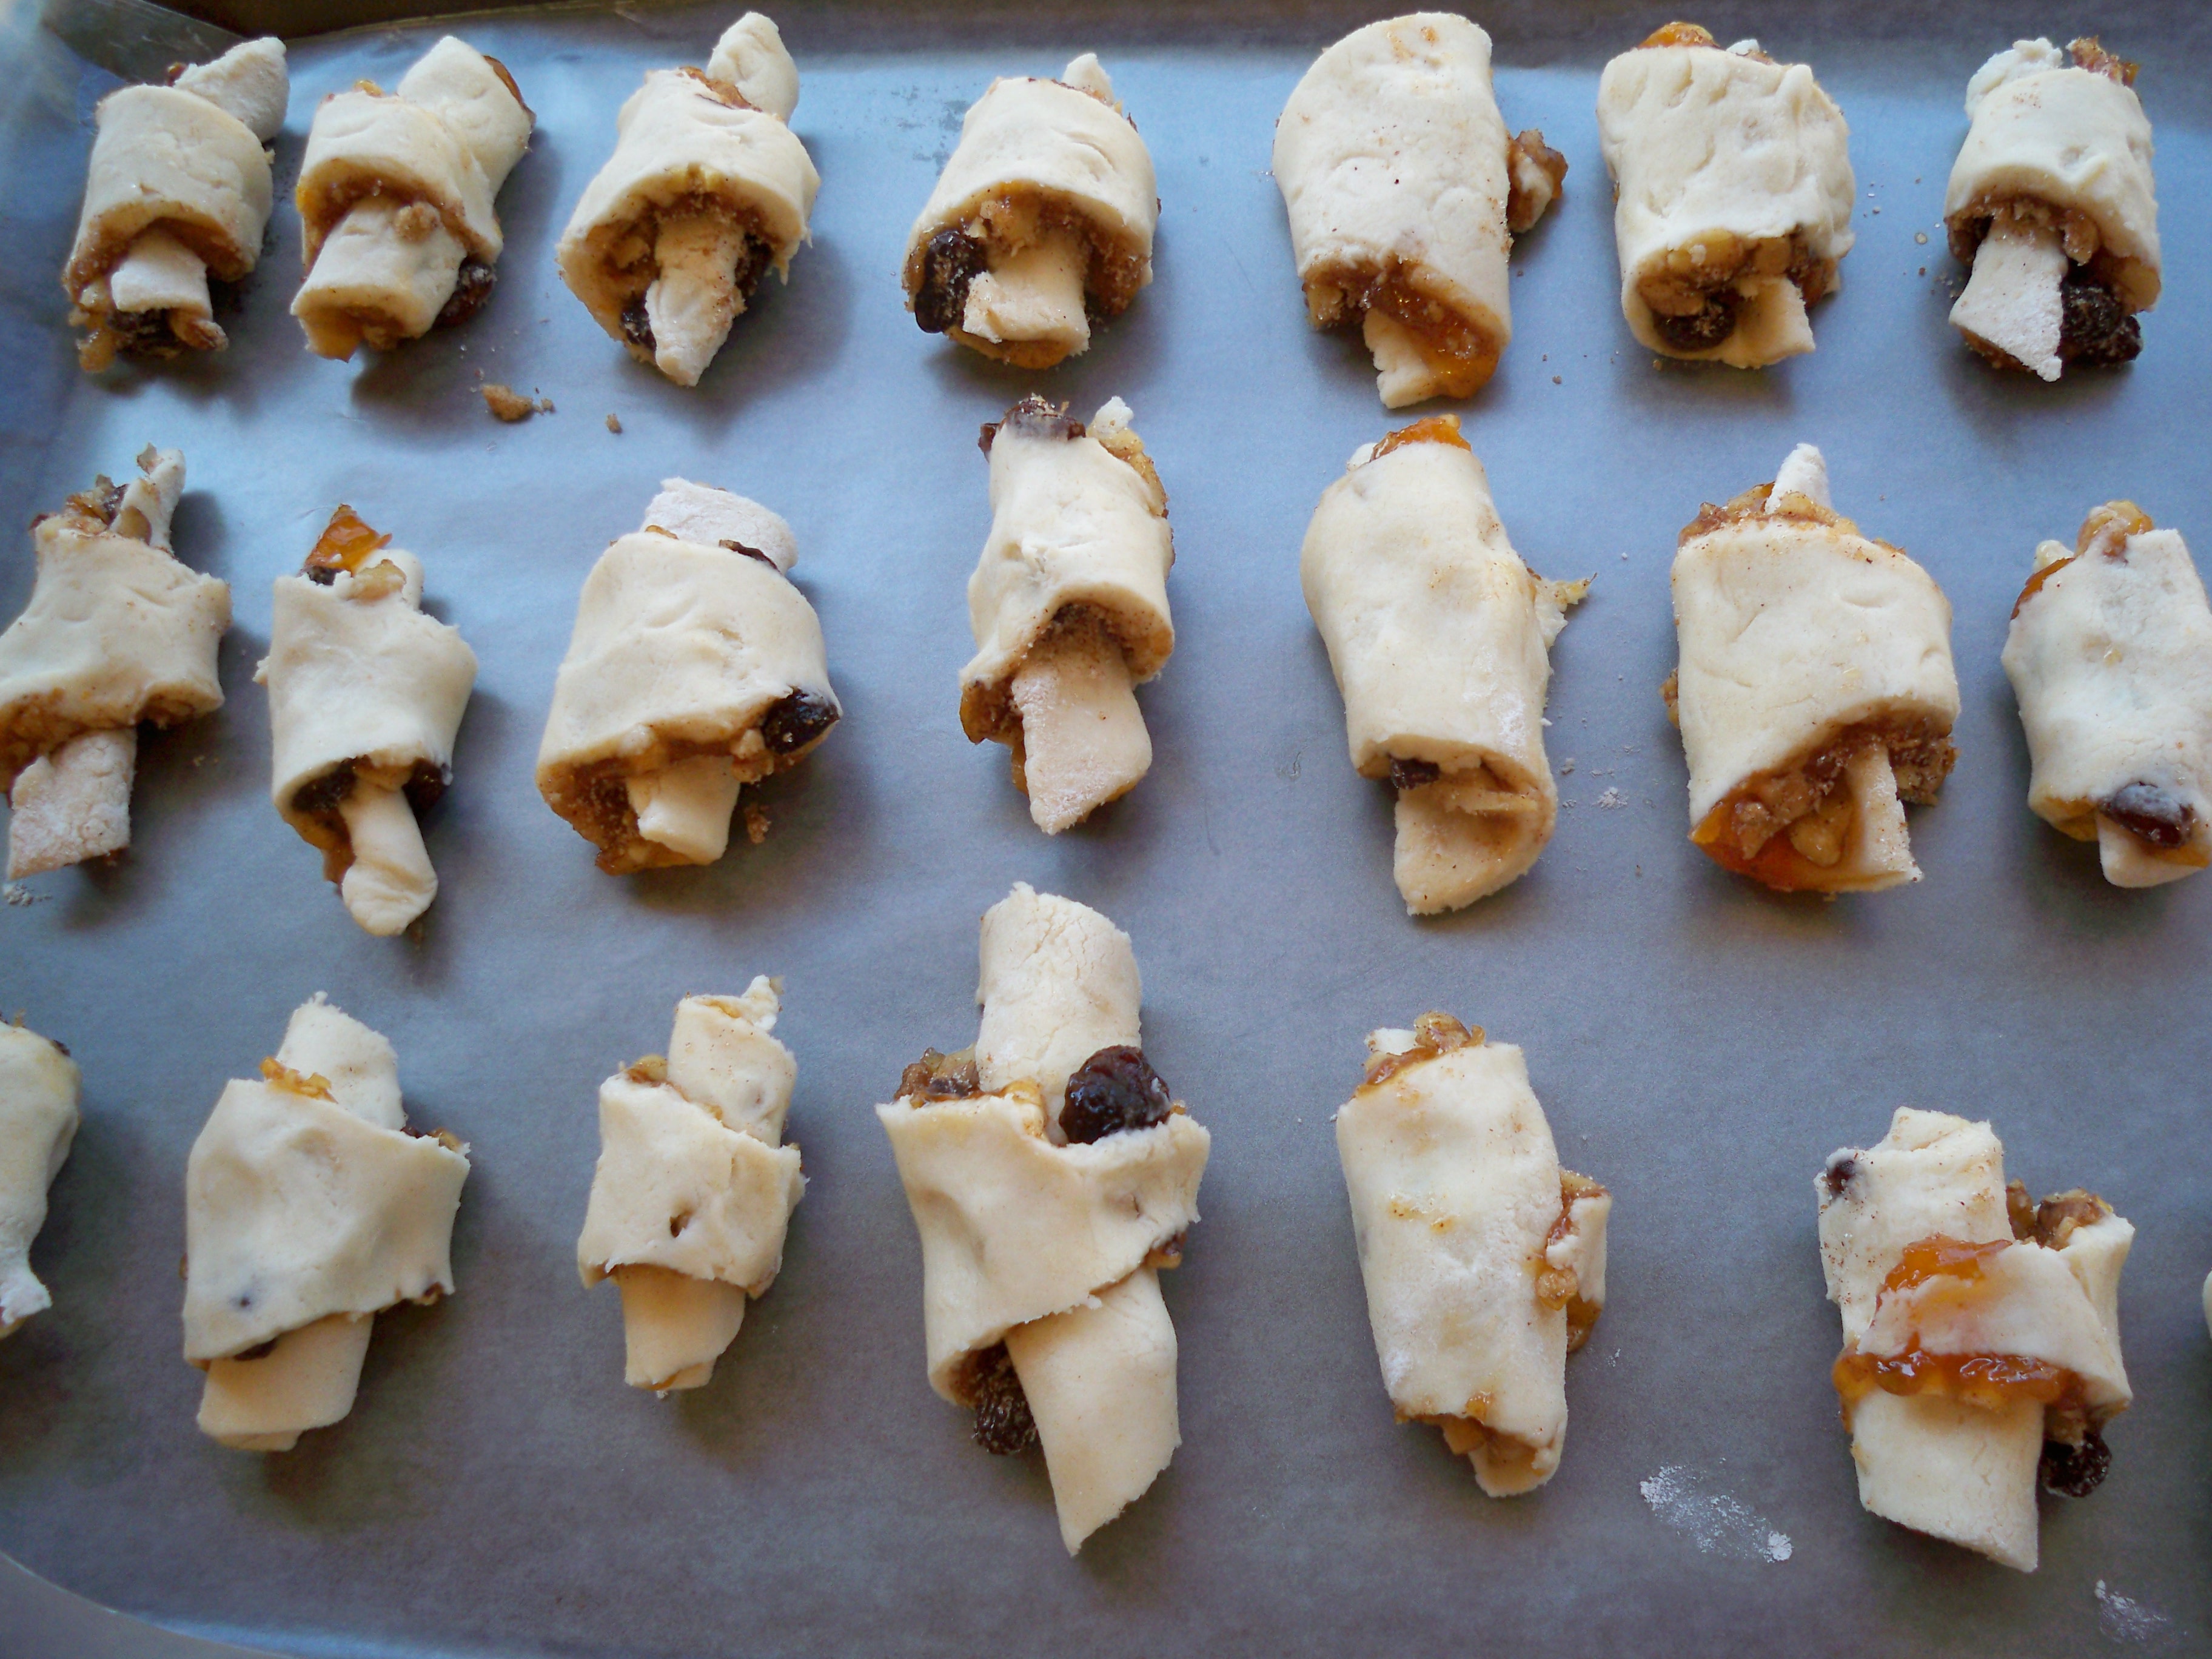
Time to scrap into jars!

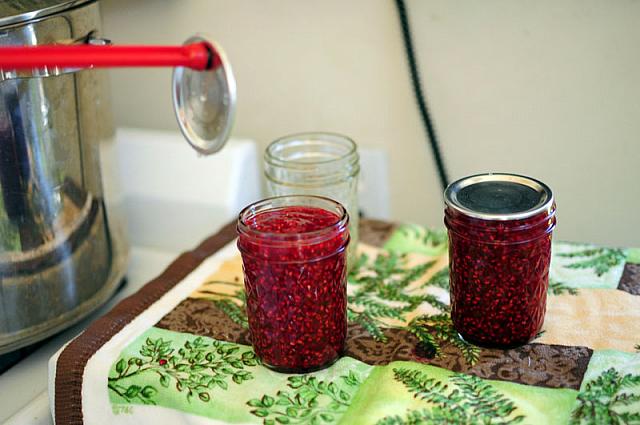
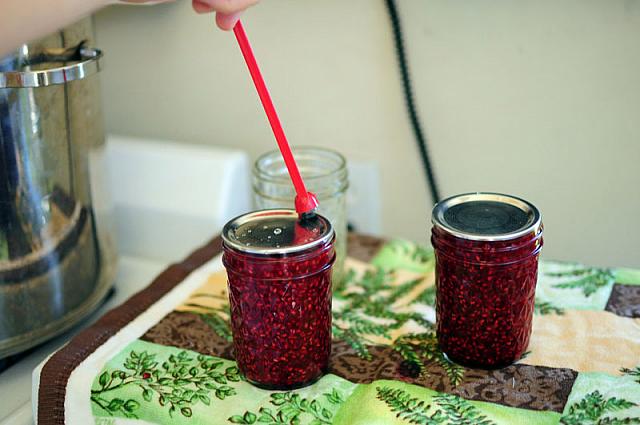
I used my handy jar magnet to put the jar lids on.

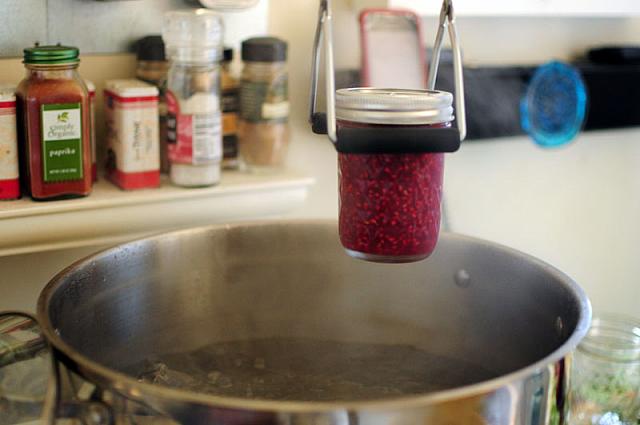
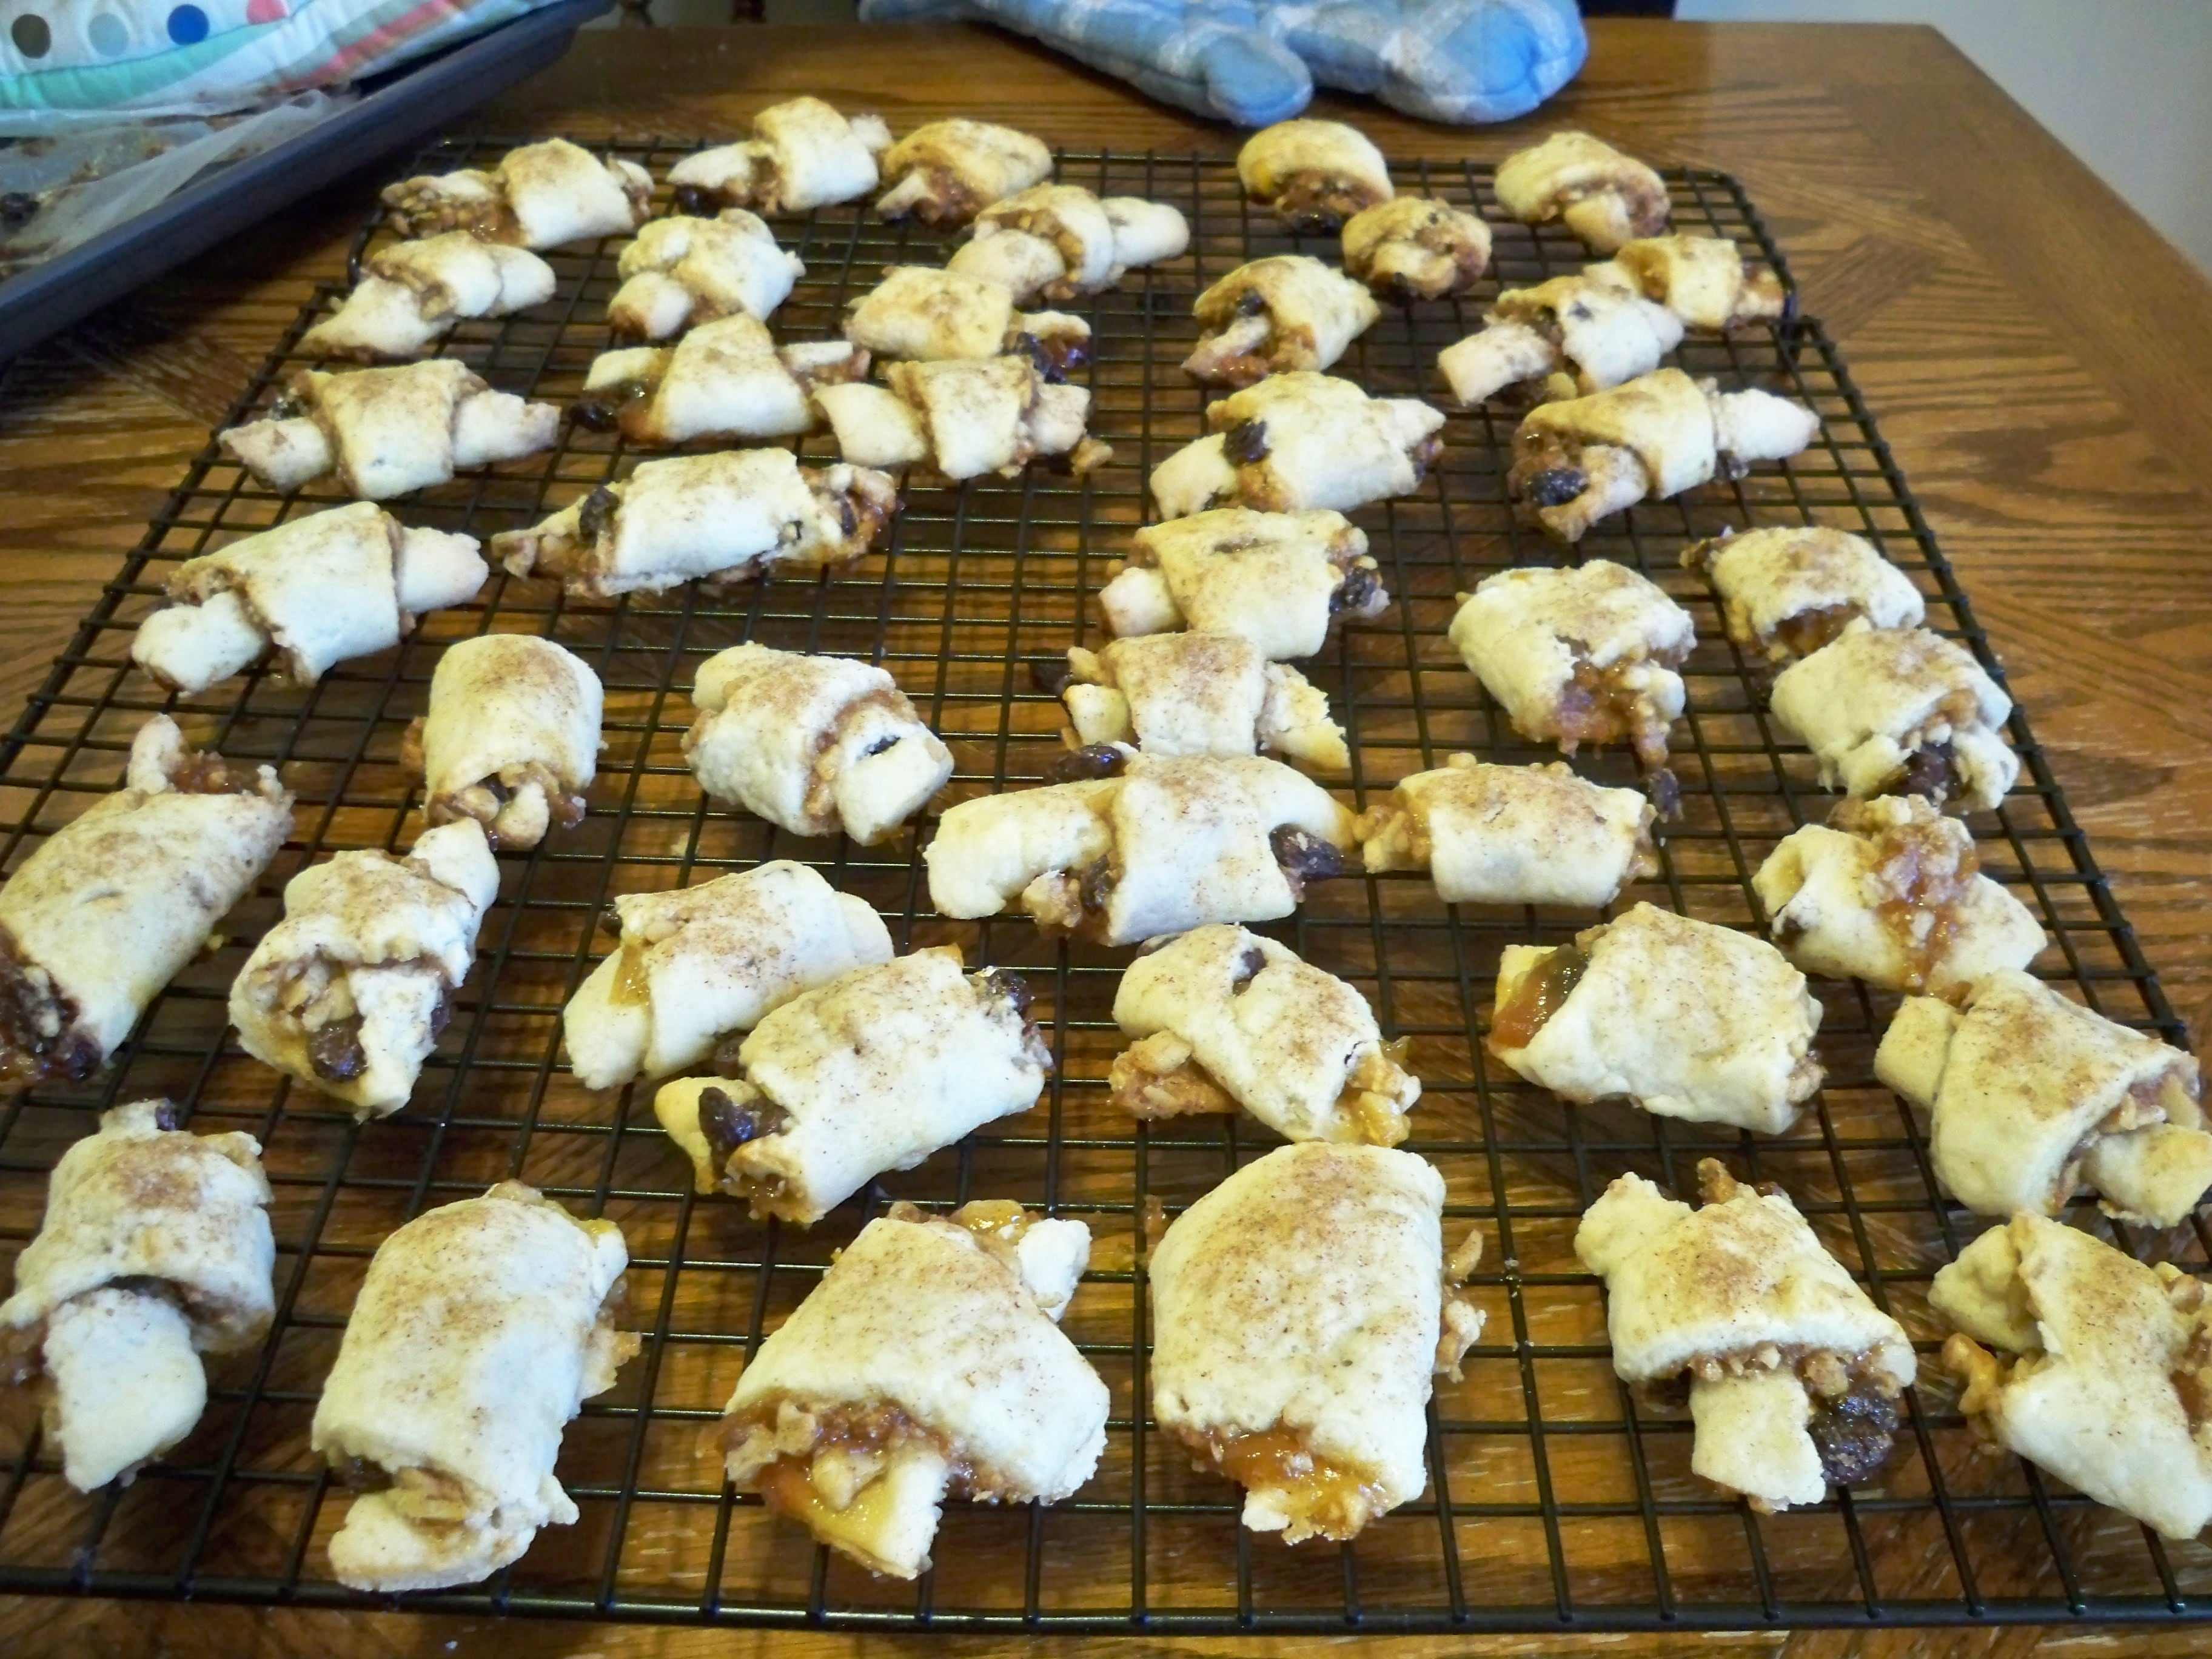
Then back into the pot! The preserves only need five minutes.

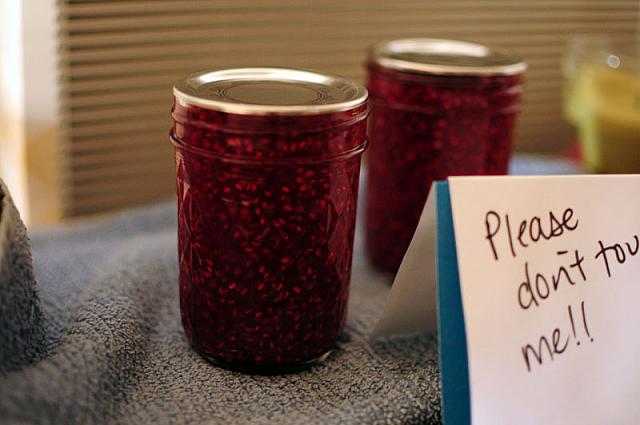
This is where they sat for twelve hours, undisturbed.

So there you have it! Canning made easy by GMS. We used Ashley English’s canning advice, as well as Liana Krissoff’s advice.

And, you know, tons of other books. Check out your local library and see what they have — I bet you’ll be surprised!


[addtoany]

Greetings again!  In this installment I’m going to give you my two cents (but in the gluten free cost conversion it’s practically a $1) on GF products that are worth their exorbitant prices.  Finding GF food that doesn’t taste like cardboard or birdseed takes some trial and error; however, I hope this brief list gives GF persons a place to start.

 It should be said that a con to all of the products below are their prices.  They are really high, which is a total bummer.  However, it is but a small price to pay when you feel like you are eating real food!  Now, please note, if you are newly GF or a non-GF person, a lot of these foods don’t taste exactly like their counterparts; however, they are completely legitimate and delicious in their own way.  I have found that it is often better to not go into eating GF food with previously held expectations.  Go forth with an open mind, you will probably be pleased.

The GF food items that can always found in my kitchen/purse/life:

1) Udi’s Bread and Bagels

I randomly found a loaf of the white Udi’s sandwich bread one year after my diagnosis in the special GF section of a Whole Foods in Boston.  While waiting for the train home from the store with two friends I stood on the platform and happily ate slices of bread right out of the bag.  There may have been some jumping up and down when I realized it tasted like actual bread instead of the small dense mealy rice flour loaves I had been eating previously.  It was an exceedingly good day.

The Bread

  • Pros: Light and fluffy.  Tastes like real bread.  Whole grain and white sandwich bread options.
  • Cons: Doesn’t freeze well, it is hard when it thaws.  Molds quickly (at least in CA) so I keep in the fridge to prevent this.  Not a normal size piece of bread; on the small side, but still adequate.
The Bagels
  • Pros: Bigger than other kinds of GF bagels.  Whole grain and white flour options.  Can handle being frozen.
  • Cons: Aren’t always sliced all the way through and are moderately fragile so you have to be careful when you rip them apart (a small price to pay).

2) Glutino Pretzels


  • Pros: Have a slightly sweet and salty flavor.  Come in a number of varieties, sticks, twists, salted, not salted, and chocolate covered!  Great snack; I’m partial to the sticks as well as the milk chocolate.
  • Cons: None that I can think of.


3) Bionaturae GF Pasta

I actually didn’t discover this wonderful and life sustaining product on my own.  My friends LMP and DP had me over for dinner when I was newly diagnosed and happened to pick up this product.  You will come to find that the people in your life become your eyes and ears and alert you to more GF products and places than you can ever find on your own.  I buy this product online in bulk off of Amazon as it is not readily available at stores near me even though I live in a humongous city.  Go figure.  Buying it offline is also slightly cheaper then what is charged in stores and it allows me to maintain a cache of this very handy staple.

  • Pros: Comes in several different varieties. Doesn’t need to be rinsed after boiling (like brown rice pasta).  Tastes like normal pasta.
  • Cons: Not carried in all places.  The company has an equally extensive non-GF line so you have to pay attention when purchasing


4)  Envirokidz Peanut Choco Drizzle Crispy Rice Bars

I have found that if you can find GF food geared toward children it tends to be very tasty.  This product is but one example of this phenomenon.  This company has several different kinds of rice bars and a whole line of cereal.  I’m very partial to the Peanut Choco Drizzle bars, not just because of the lemur on the packaging, but it definitely helps.

  • Pros: Comes in individually wrapped boxes of six which can be easily be toted around as back up/emergency food, or say, breakfast.  As far as snack foods go they aren’t terrible for you nutritionally or calorically. Organic.
  • Cons: None that I can think of.  Maybe when the box runs out.


5) Kinnikinnick Kinnitoos

  • Pros: Natural ingredients.  Lack other allergens.  Delicious substitute for Oreos.
  • Cons: Because there aren’t gross ingredients they tend to get stale and soggy pretty quickly once they are opened so make sure to wrap up leftovers tight (as if there would be any).


6) Applegate Farms Products


I like most, if not all of their products, which range from frozen food to deli meats to sliced cheese.  Fun fact, they are based in my hometown. I found this out long after I had left home, but I think it is a nice coincidence, brings things full circle.

  • Pros: Obvious GF labeling.  Raise their animals in an appropriate manner.  Organic. Tasty products.
  • Cons: Have non-GF varieties of frozen food, so pay attention when purchasing.

This is by no means an exhaustive list, just the products I wish I knew about starting out in the GF wilderness.  If there is a food that you’d like a GF recommendation on, feel free to leave a comment and I will let you know.

In the next installment we’ll embark on the prospect of restaurant eating and about ordering food out in the world.


[addtoany]

No quiche here…this is a tart! Plain and simple in all it’s glory.

This is serious onion-y goodness…topped off with a little bacon.  Who can complain?  NO ONE…that is the answer.  If you say you don’t like onions, and I make you try this, and you still don’t like onions…I don’t think we can be friends.  This tart has the essence of all things good about onions, and none of the bad, and I sweetened the deal with bacon…c’mon…just try a little bit!

French Onion & Bacon Tart
recipe from America’s Test Kitchen

Crust:
1¼ cup flour
1 scant tbsp. sugar
½ tsp. salt
1 stick (8 tbsp.) cold butter cubed
2 tbsp. ice water

Filling:
4-6 slices of bacon (your preference)
6 cups of sliced onions
1 sprig of thyme
2 eggs
½ cup of half & half
salt and pepper

Start with the crust.  This is a press-in crust, so no rolling of delicate pastry dough necessary.  You can mix everything and cut in the butter by hand…OR…you can use a Cuisinart or food processor.  Definitely the easier way to go.

Preheat the oven to 375º.  Put the flour, sugar and salt in the bowl and pulse a few times to mix.  Dump in all the butter and pulse about 15 times total.  You want to cut the butter up smaller than you would for a flaky pie crust.

Now, add in 2 tbsp. of the ice cold water and turn the machine on for 5-6 seconds.  You’ll know that you have the right amount of moisture in the dough by removing the lid, reaching in and grabbing a handful, squeeze it together and if it clumps…it’s perfect.  If it is still crumbly and does not stick together, then put the lid back on, add another ½ to 1 teaspoon of ice water and turn on again for another 5-6 seconds.

Here’s the fun part…just grab some handfuls, drop them into a greased tart pan and start pressing it in.  Try and make it an even layer across the bottom of the pan.

Continue pressing and work the dough up the sides of the pan.  If it is too thick in one area, go ahead and pinch it off, then smush it back where it’s a little thin.  This took a little more time than I anticipated, but some saran wrap can do wonders to help you smooth out the surface.  Place a piece over the top of the dough, and rub the surface.  The heat of your hand and the pressure will smooth out all the lumps.  To avoid shrinkage…(no one likes shrinkage!)…place it on a plate and put it in the freezer to firm up and rest for at least 30 minutes.

While the dough is resting, you can prep your ingredients for the filling.  Slice up 1-2 onions in ¼ to ½ inch strips.  The onions will cook down quite a bit, so you’ll probably need more than you think.  Steer clear of sweet onions and red onions for this recipe.  The first is too sweet and the second will tint everything a bit of a mauve color…not the effect you’re looking for.

Throw your bacon strips into a cold pan.  Letting the strips warm up with the pan (only to medium heat) will make crispy bacon with a lot of the fat rendered out.  Putting bacon straight into a hot pan, will cook it faster, but you can end up with bacon that is over and under cooked all at the same time.  Once bacon is cooked, remove from pan and drain on paper towels.  Depending on how much bacon fat is left in the pan, you may want to drain some of it…but what you leave in the pan will add bacon-y smoky flavor to your onions!  (drool!)

Toss the onions into the pan, toss to coat, add in a sprig of thyme, a good sprinkling of salt and keep the heat medium or just below.  You want to almost steep the onions, and avoid browning them which can make them too sweet.  Once you’ve tossed them around a bit, throw a lid on the pan, turn the heat down and let them cook, sweat and steam for about 20 minutes.

Switch back to crust – pull it out of the freezer, place it on a cookie sheet, add a sheet of foil on top and press it in gently and then fill with your favorite pie weight (dry beans, rice, actual pie weights, marbles, ball bearings, something heavy that won’t mind some serious heat!).  Place in the oven for 30 minutes while the onions are cooking.

Custard Time!  The custard for this recipe is just a glue…binds it all together and is a tasty backdrop to the star of the show, Monsieur Onion!  Beat the eggs and add in the half and half, a grind or two of black pepper and a touch of salt, mix well and set aside.

You may wonder about the lack of pictures for this part of the recipe…well, there are moments while cooking, that I completely forget to get pictures and only later realize that I missed about half the process.  Use your imagination!

While you are waiting, try not to snack on all the bacon.  If we’re being honest, I find this step the most difficult.

Check on the onions, they should be translucent, soft and very fragrant.  Remove them from the heat and cool long enough that they won’t cook the eggs when added to the custard.  When the crust comes out, remove the pie weights and foil.  Remove the thyme sprigs from the onions and mix them into the custard.  Pour it all into the tart crust, sprinkle with bacon pieces and put it back in the 375º oven for 25-30 minutes on the middle rack.

You’ll know the tart is done when a) you can no longer handle how good your kitchen smells, and b) when the custard is fully set…it shouldn’t jiggle!

I love the bacon on top because it stays crisp, unlike when it is added to the custard of quiche’s and it softens up.  Carefully remove the rim of the tart pan, once it is cooled and then you can cut a slice and serve it up.  This made a perfect dinner with a simple salad of mixed greens dressed simply with lemon juice and olive oil and served with a crisp, dry white wine!

Bon appétit!


[addtoany]

A  few weeks ago, I got these two pictures in my email from my Mom (Hi Mom!)

I was so impressed with her ingenious use of toppings for her cake balls (she used chopped pistachio, chopped chocolate covered pretzels, coconut, sprinkles, and mini chocolate chips). Well done! I was equally impressed with her rugelach, and became inspired to make some of my own! I asked Mom for the recipe she used and she sent me this recipe from Barefoot Contessa:

8 ounces cream cheese at room temperature
1/2 pound unsalted butter at room temperature
1/4 cup granulated sugar plus 9 tablespoons
1/4 teaspoon kosher salt
1 teaspoon pure vanilla extract
2 cups all-purpose flour
1/4 cup light brown sugar, packed
1 1/2 teaspoons ground cinnamon
3/4 cup raisins
1 cup walnuts, finely chopped
1/2 cup apricot preserves, puréed in a food processor
1 egg beaten with 1 tablespoon milk, for egg wash
Yields: 48 cookies (and it’s accurate!)

Rugelach is traditionally a Jewish dessert eaten on Shabbat (basically, Friday night at sunset through Saturday night until sunset). That doesn’t mean you can’t make it on a Sunday, which is what I did. I enlisted the help of Jennie for this undertaking. We assembled our ingredients, and got to work. Rugelach isn’t difficult to make, however I do warn you, it is time consuming. After making the dough, it has to chill for an hour. The cookies have to chill again after they are fully assembled for about 30 minutes. All in all, it took us around 3 hours to complete the cookies, between multiple chillings and then finally baking. Trust me, it’s worth it though! Rugelach is quite delicious, and can be made with a wide variety of fillings, such as chocolate, raspberry, and of course, the apricot ones we made.

Start by mixing the butter and cream cheese with a mixer until light and fluffy.

Add 1/4 cup granulated sugar, salt, and vanilla to the deliciousness. Next up is the flour. If you are like me, your mixer may say it has multiple speeds (1-5 for example), but considering I bought mine for 10 bucks at Target, I can’t really blame it for really only running fast, super fast, or way to fast to add anything to what you are mixing, as far as speeds go. Therefore, I recommend stopping the mixing in between flour additions so as not to douse yourself (or your helper) in flour.

Dump the dough out onto a well-floured board and roll it into a ball.

Divide your dough into four balls, wrap them up in plastic, and “chill.” Now, Jennie and I interpreted chill to mean freeze, but after a quick consultaion with the internet, we determined it meant refrigerate. I’m impatient, so we should have put them in the freezer, but we settled on the fridge this time around.

While our dough chilled, Jennie and I worked on a side project – staining my dresser. Check it out!


Five minutes before the dough is done chilling mix the filling. To make the filling, combine 6 tablespoons of granulated sugar, the brown sugar, 1/2 teaspoon cinnamon, the raisins, and walnuts. Or, if you are Jennie, just put all 1 ½ teaspoons of the cinnamon in. No big deal.

When the dough has been chilled for an hour, flour a cutting board and roll out each of the 4 balls into a 9 inch circle.

Spread the preserves like you would sauce on a pizza, using about 2 tablespoons for each 9 inch circle. Recipe says to puree the preserves, but we just picked out the chunks instead. Whatever works…

Then, add your filling (about ½ cup). As I generally tend to be, I was heavy handed on the filling of the cookies.

Press everything gently into the dough, and cut your cookie circle into quarters. Then cut each quarter into thirds. You should have 12 little cookie slices that look like miniature pizza slices.

Roll them up, starting at the wide end, and place them point side down on a cookie sheet lined with wax paper.

Once all four doughs are done, it is time to chill again. This time I used the freezer. Preheat the oven to 350 degrees. After 30 minutes, combine the egg with 1 tablespoon milk for the egg wash. Brush the tops of each cookie with the egg wash. Sprinkle any leftover sugar/cinnamon combo filling you may have, which is what we did, or if you happen to have used it all up in the filling, mix 3 tablespoons granulated sugar with 1 teaspoon cinnamon.


Let the baking begin! This recipe says with your oven on 350, the cookies should bake for 15-20 minutes. Jennie and I wound up cooking them for more like 25-30 minutes to get them properly browned. Of course, she sampled one approximately 3 seconds after they came out of the oven and burned off a few taste buds. I waited, and was rewarded with a warm, gooey, tasty cookie.

We brought them into work the next day to pass around to coworkers/brown nose/woo new friends with food. It was very successful!


[addtoany]

July’s challenges included one of us in school full time and the other with a broken finger, so we only managed to get around to one of our three proposed recipes. For Paul’s birthday, I figured we could do cupcakes, which is something we’ve been meaning to do. I enlisted the help of some friends (thank you thank you Ellen and Jessica!) who I could not have baked without.

Look at my broken finger! I can still stir, though! Here we’re making the vanilla lemon cupcakes.

Notice the outdoor space. We did this because Melissa was coming over later!

One lovely assistant, Jess!

Teamwork. 🙂

Cocoa makes everything better.

This is the chocolate cupcake batter.

The two batters. Lemon vanilla and chocolate. A spin off my favorite pie!

Starting to swirl. Forgive the photos, Jeffrey has it with him in the east.

I mainly prefer chocolate. Can you tell which is mine? The middle one is Ellen’s, then Jessica’s.

We got to a point where we knew we had a lot of cupcakes left to make, and I only        have one cupcake tin. So we made mini cakes!

Turns out we had a lot more chocolate, because we often started with lemon vanilla. Whoops! Here are some all chocolate cupcakes.

Frosted cupcake!

Lovely assistant number 2!

The cake and I…at the bar. Because that’s how we roll.

The birthday boy, me, and the marble cake!

Special, special thanks to Ellen and Jessica for their superb help!!! Recipe to follow.


[addtoany]